Quickstart
Your first exam, start to finish. Each step shows the screen you’ll see and where to click. Using Canvas? Start with Canvas (LTI). Once you’re in, the grading steps are the same.
Step 1: Create your account
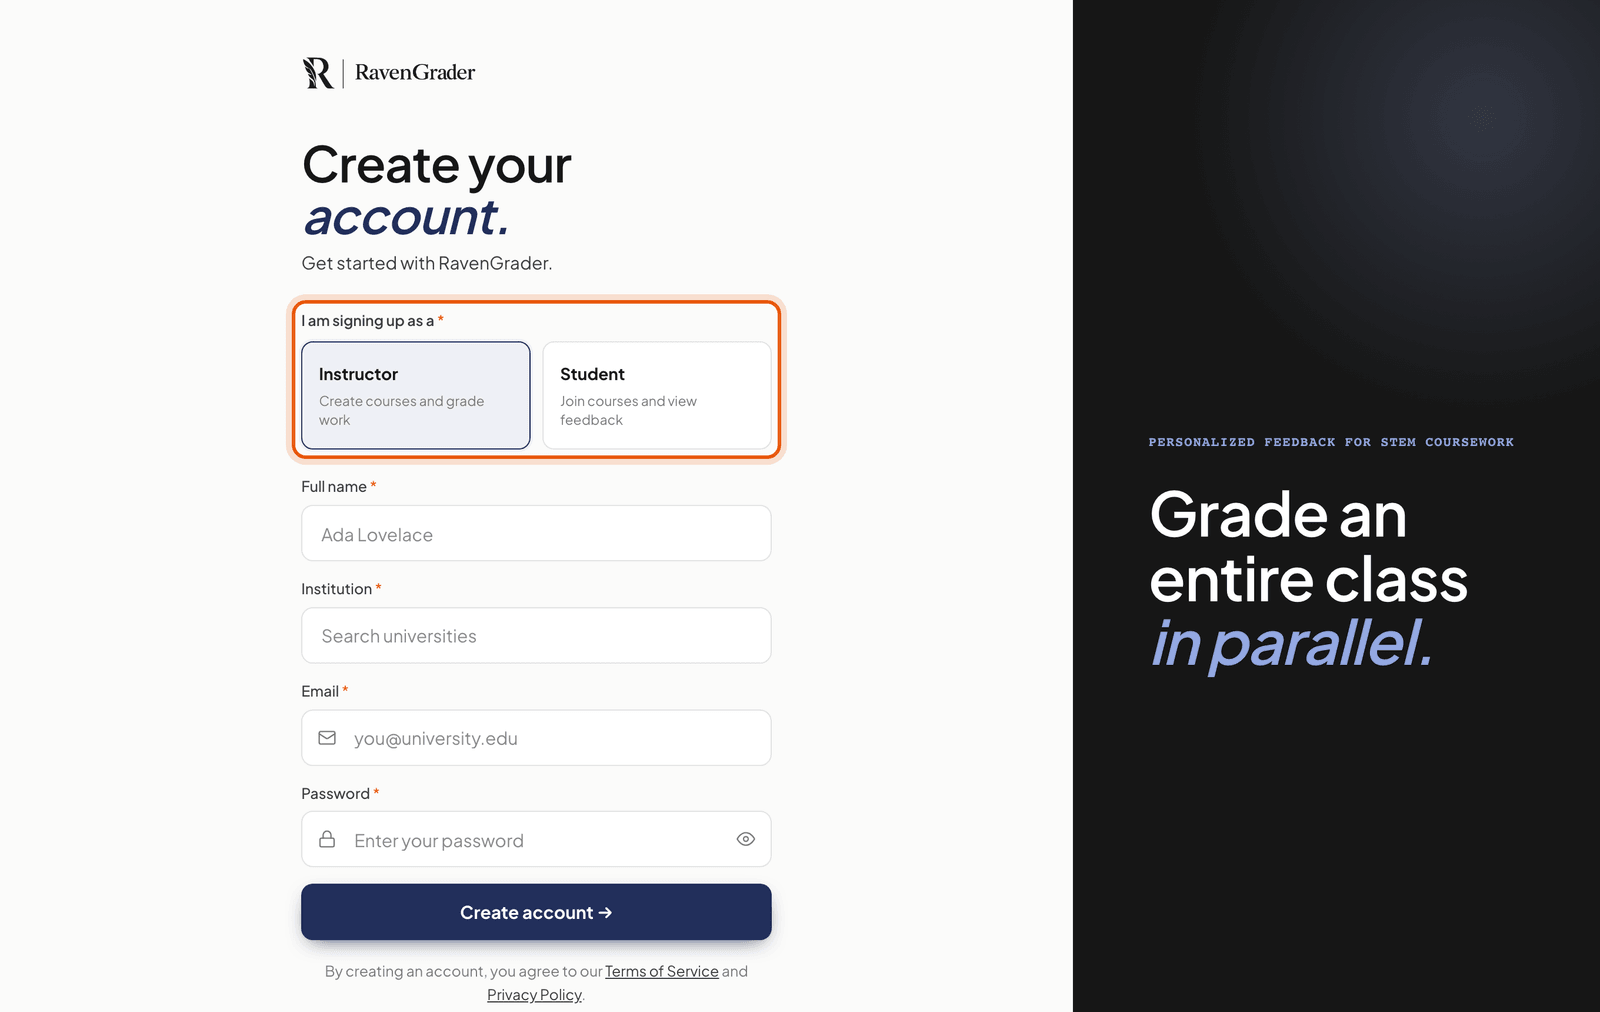
Go to ravengrader.com/signup and pick Instructor. Sign up with your email, or use Continue with Google. New accounts start with free pages, so you can grade a real exam before you pay anything.
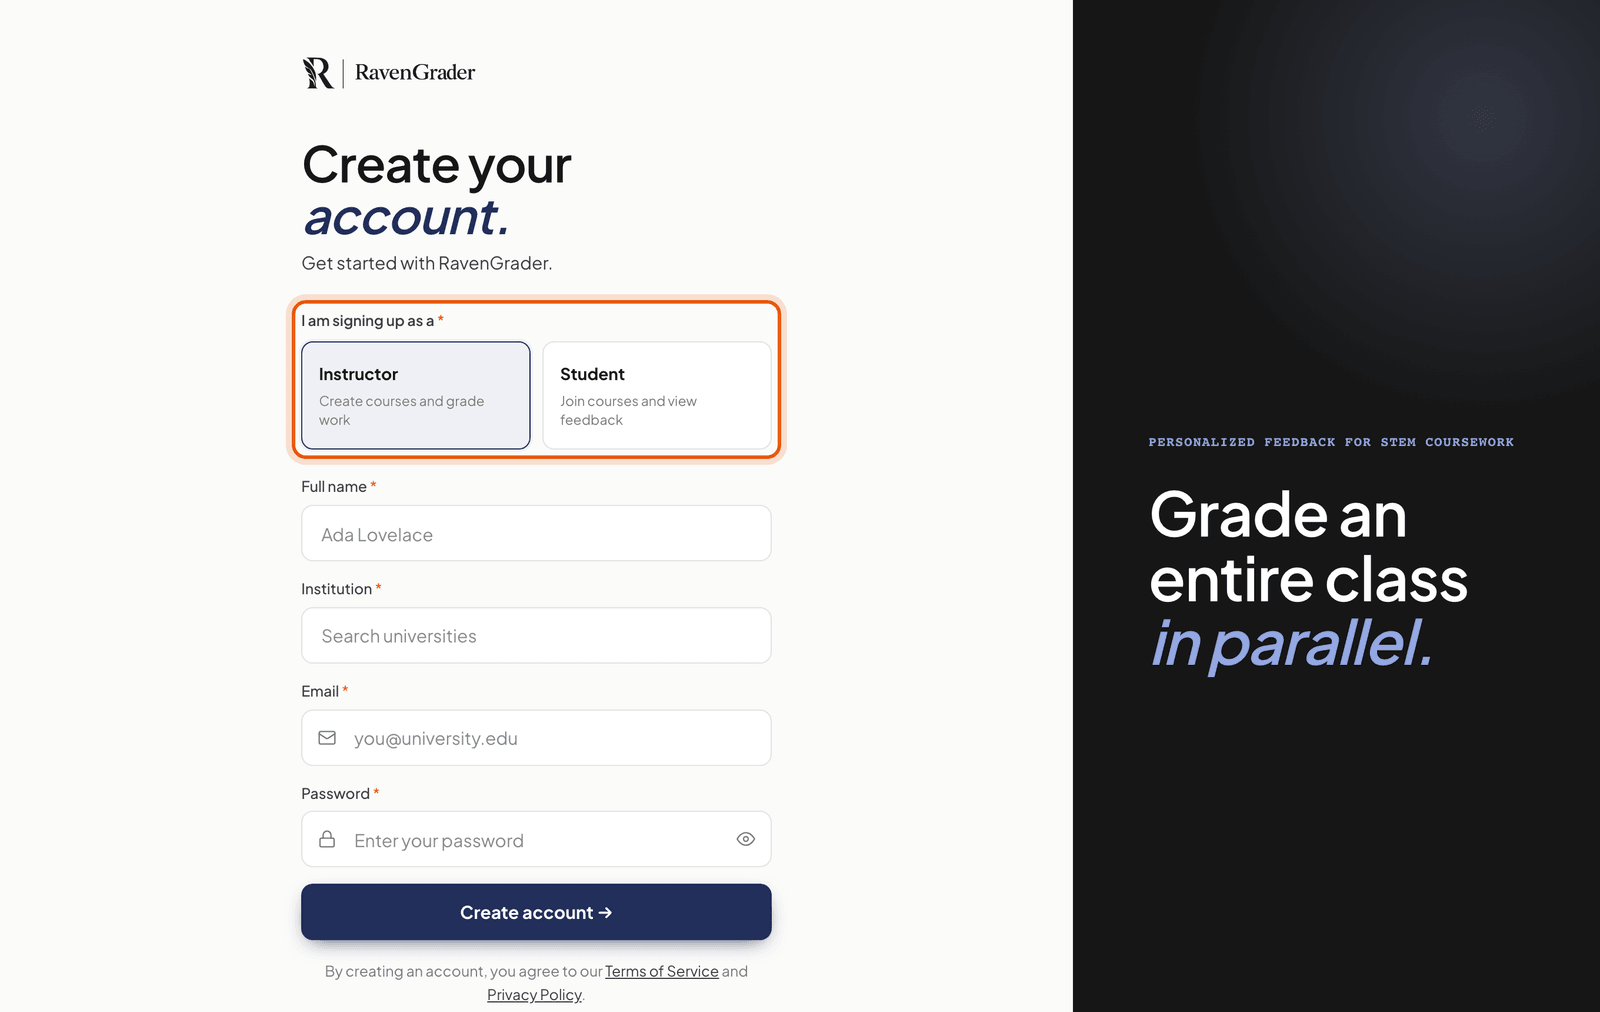
Where it is: the account type choice near the top of the sign-up form. Pick Instructor. Step 2: Create a course
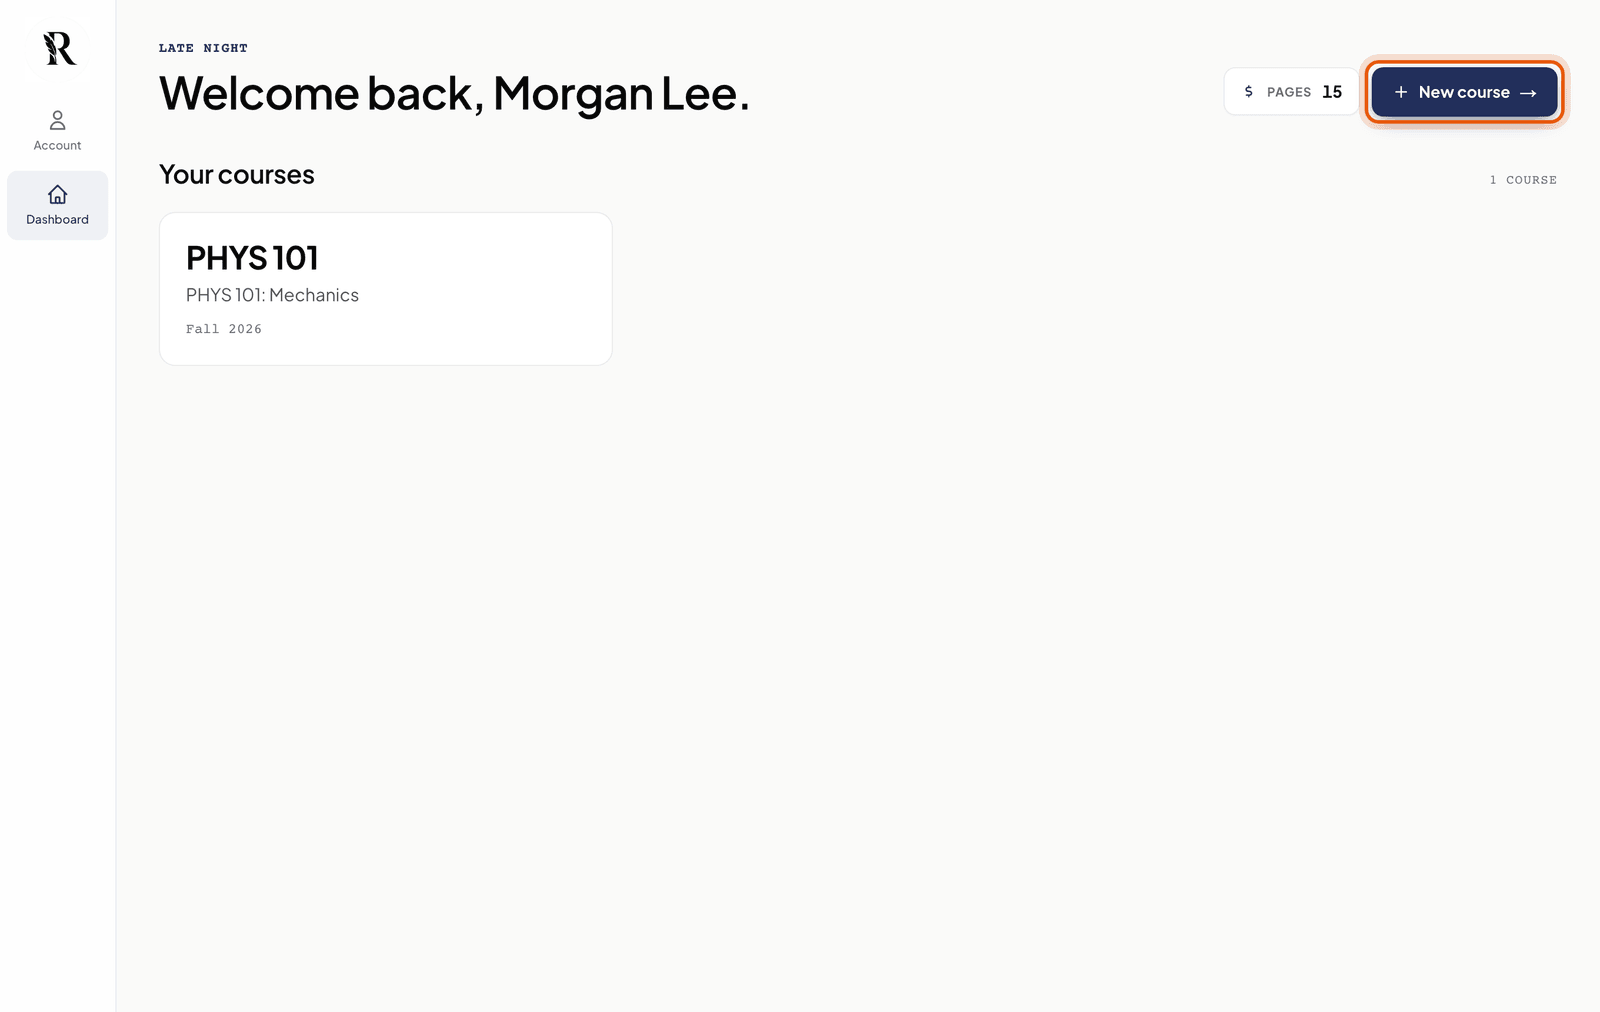
On your dashboard, click New course, give it a name, and click Create course. A course holds your assignments, your students, and anyone helping you grade.
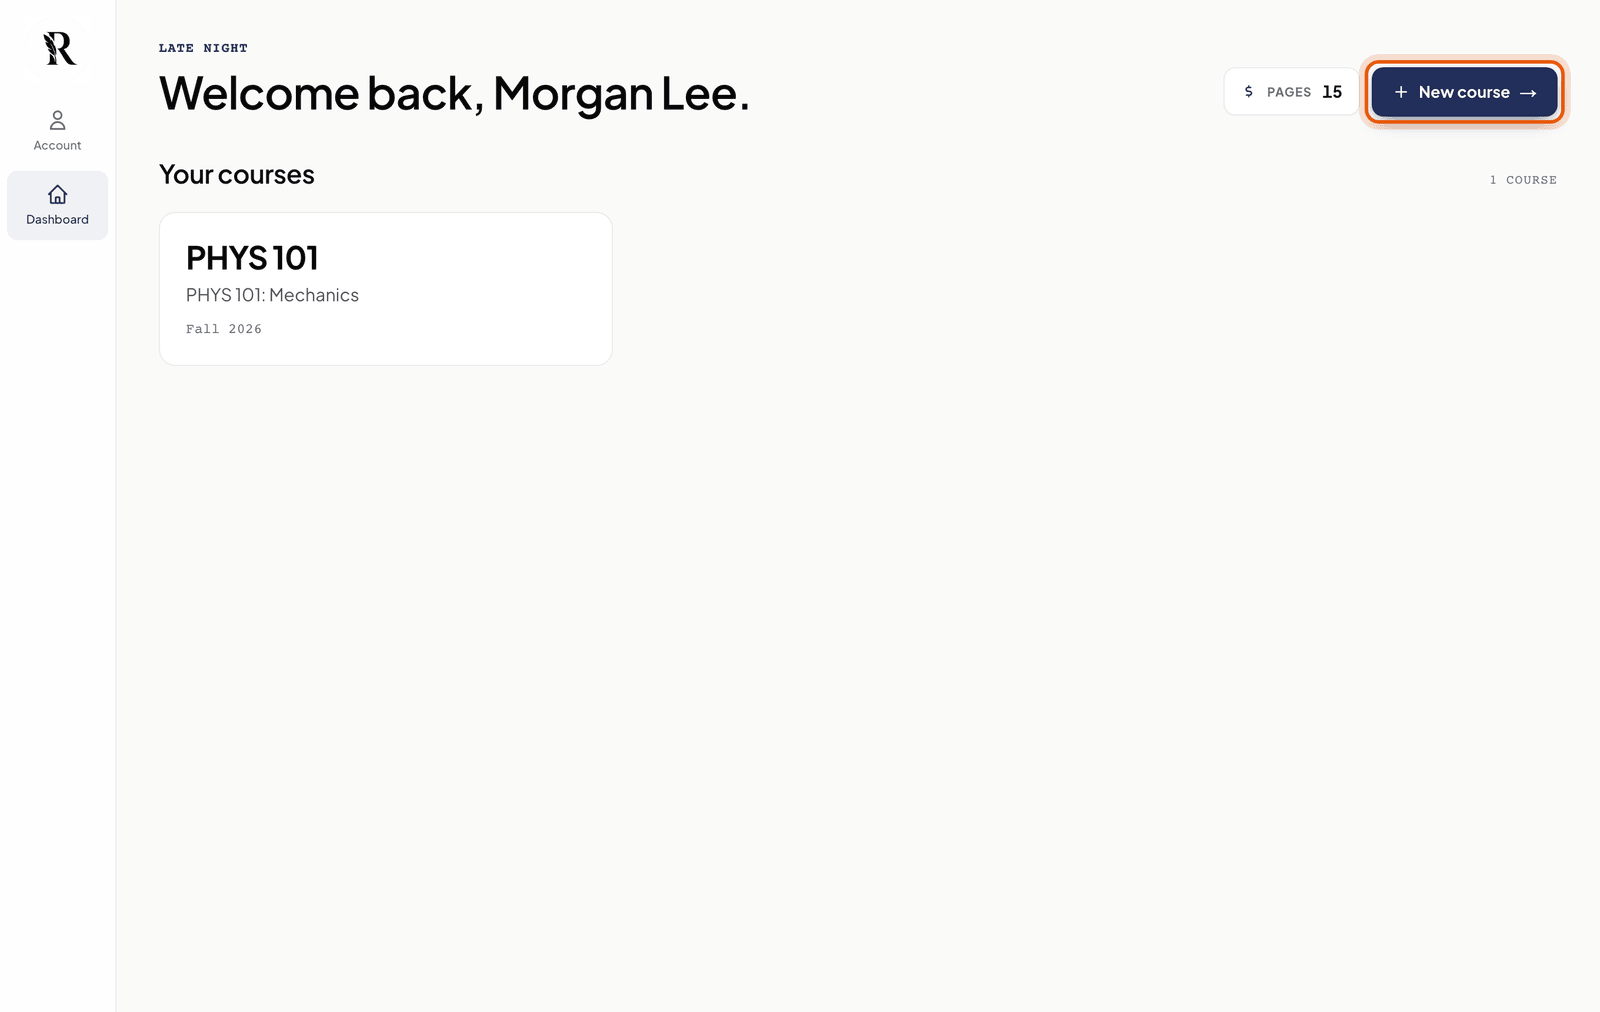
Where it is: the New course button on your dashboard. To add a TA or grader, click the share icon on the course card. Type their email, pick Instructor, TA or Grader, and click Invite.
Step 3: Add an assignment
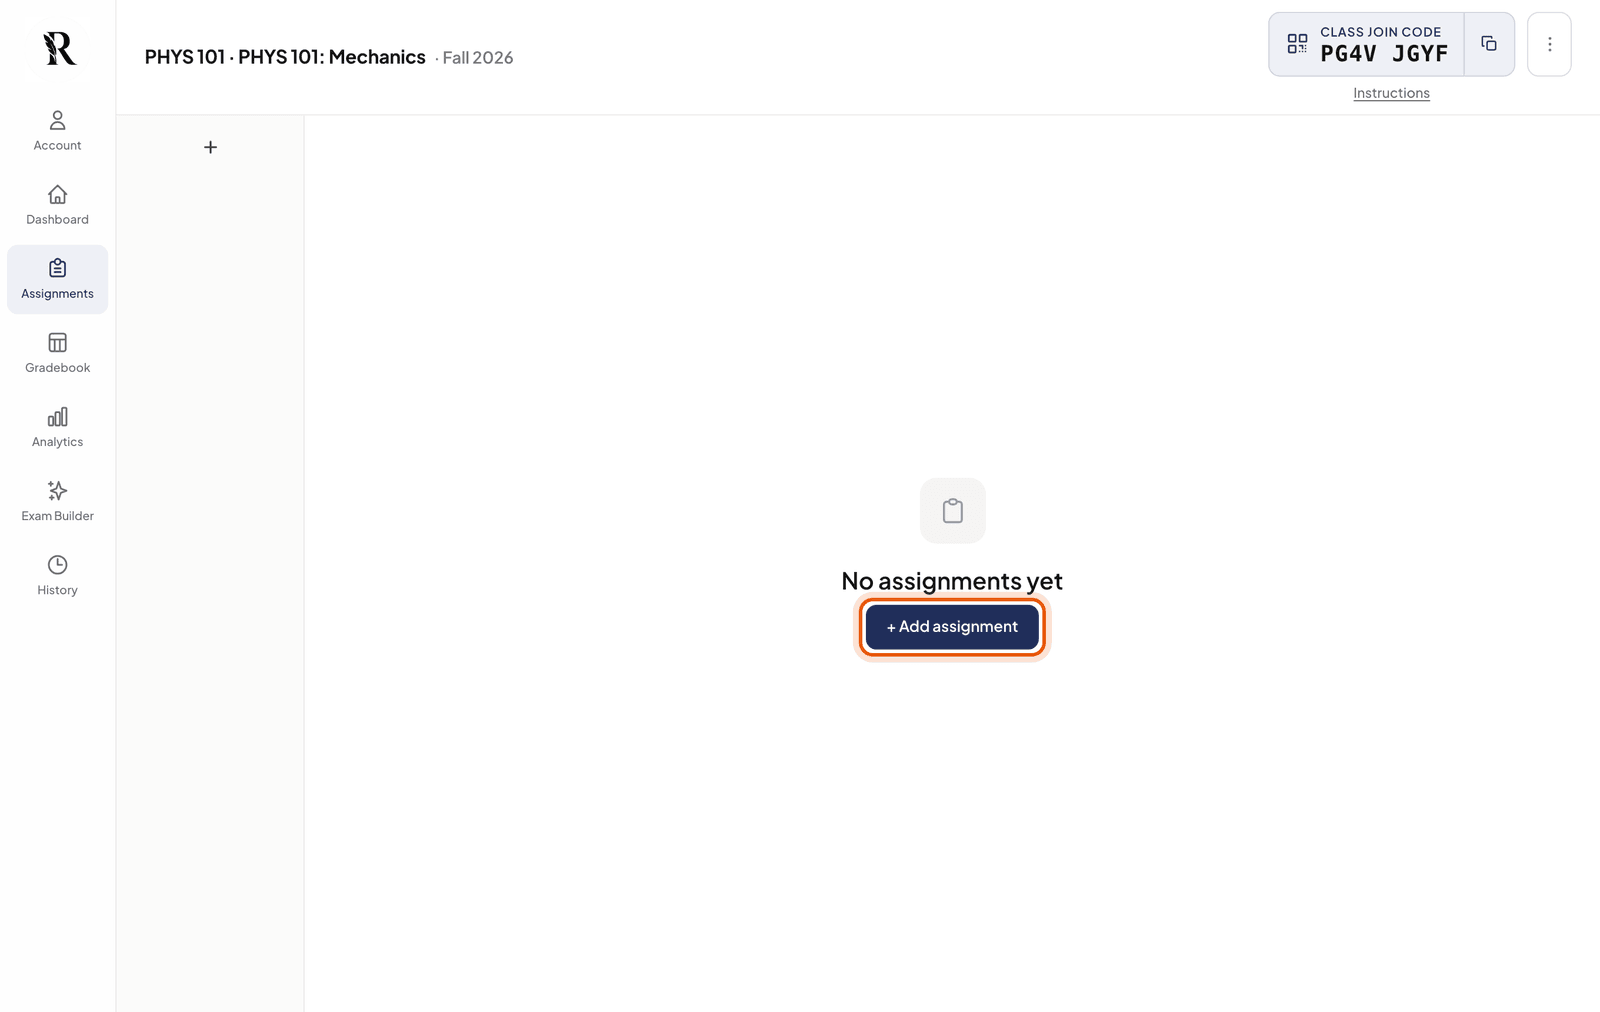
Open the course and click + Add assignment. An assignment is one exam, quiz, or problem set. Name it and click Create assignment.
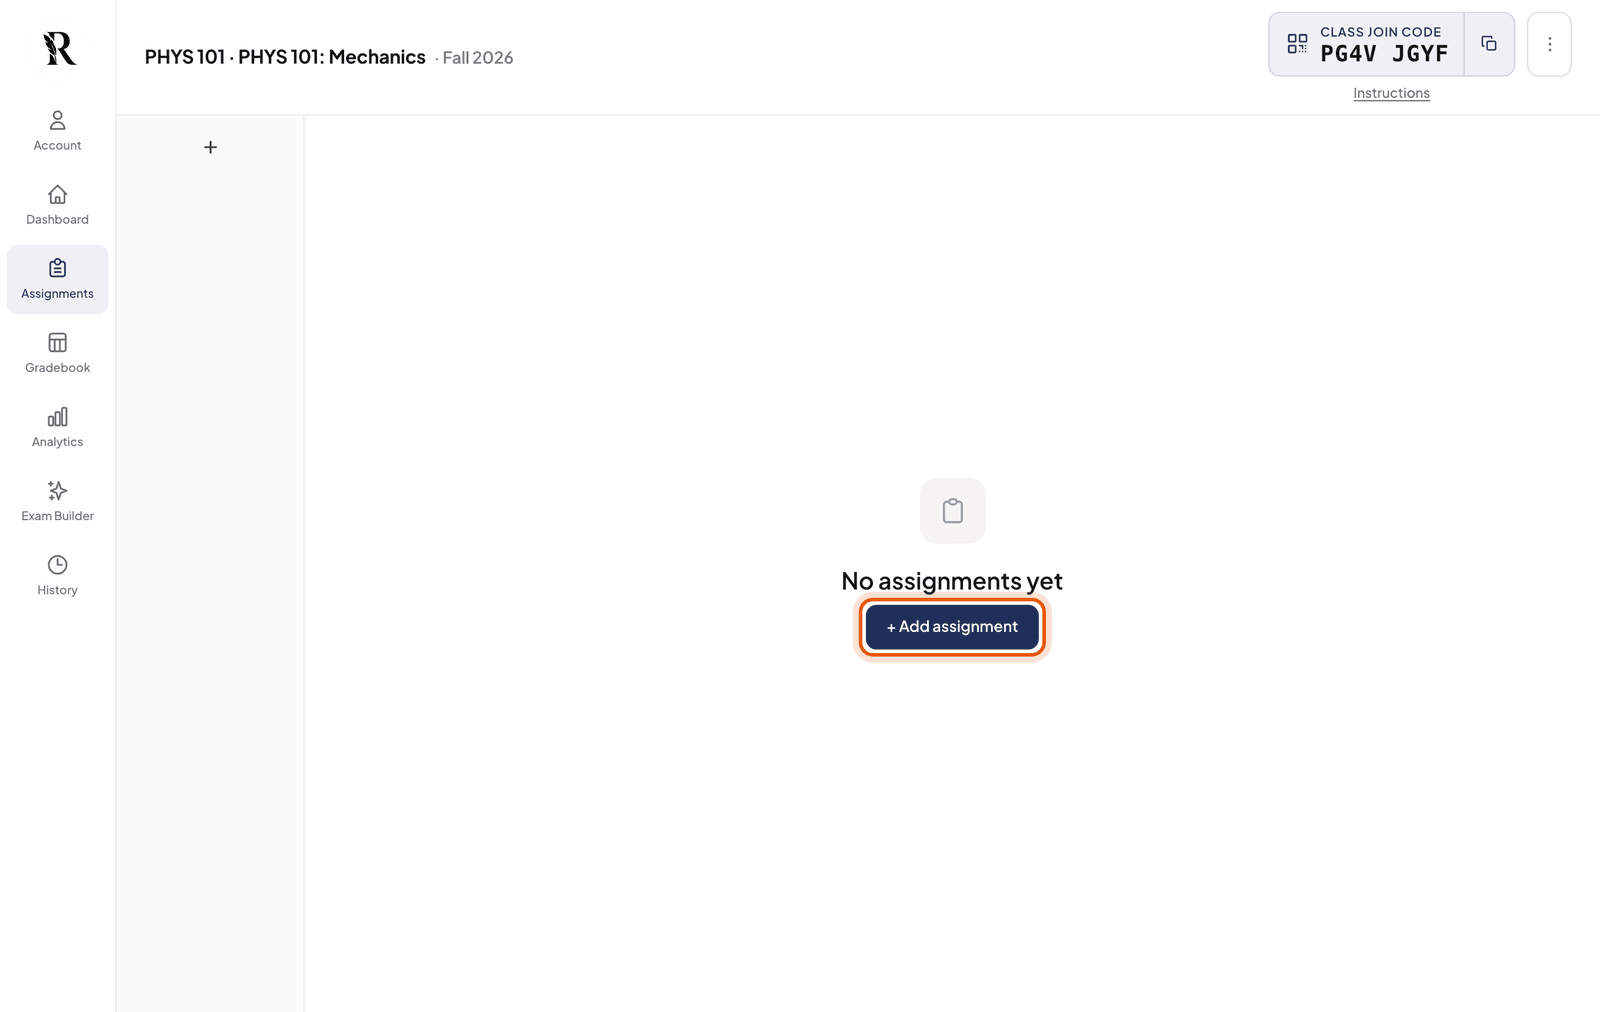
Where it is: the + Add assignment button on the course page. Step 4: Upload your exam and answer key
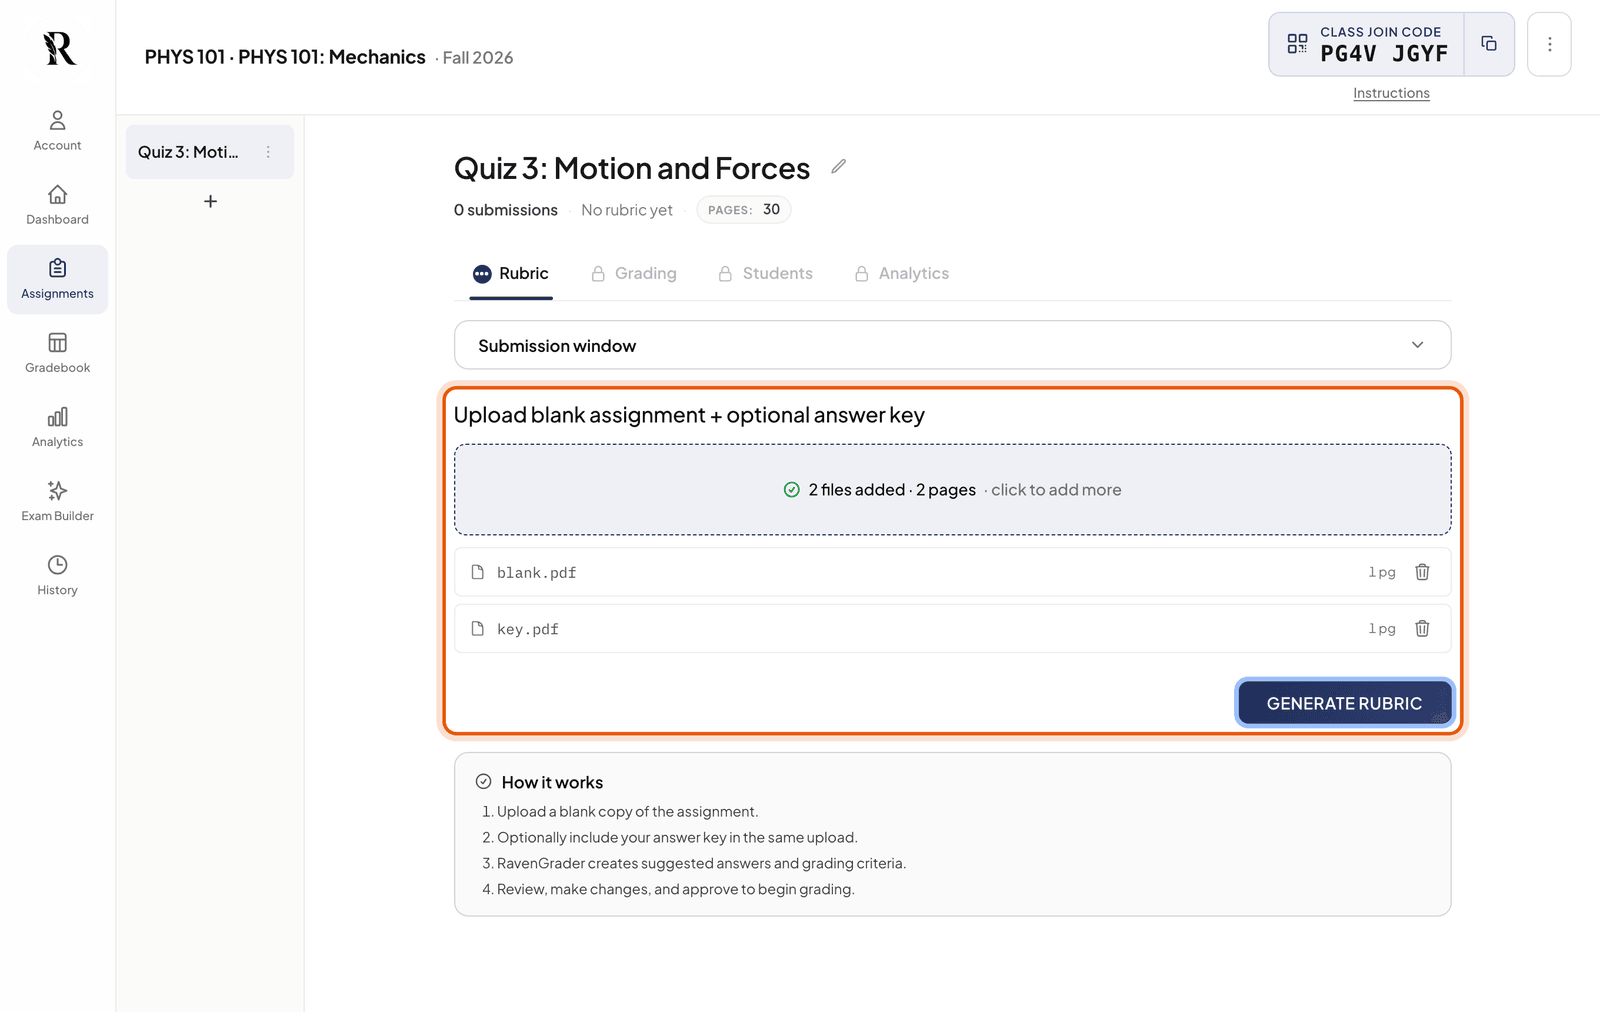
The assignment opens on the Rubric tab. Drop in the blank exam and, if you have one, your answer key. PDFs, photos (JPG, PNG, HEIC) and Word files all work. Then click Generate rubric.
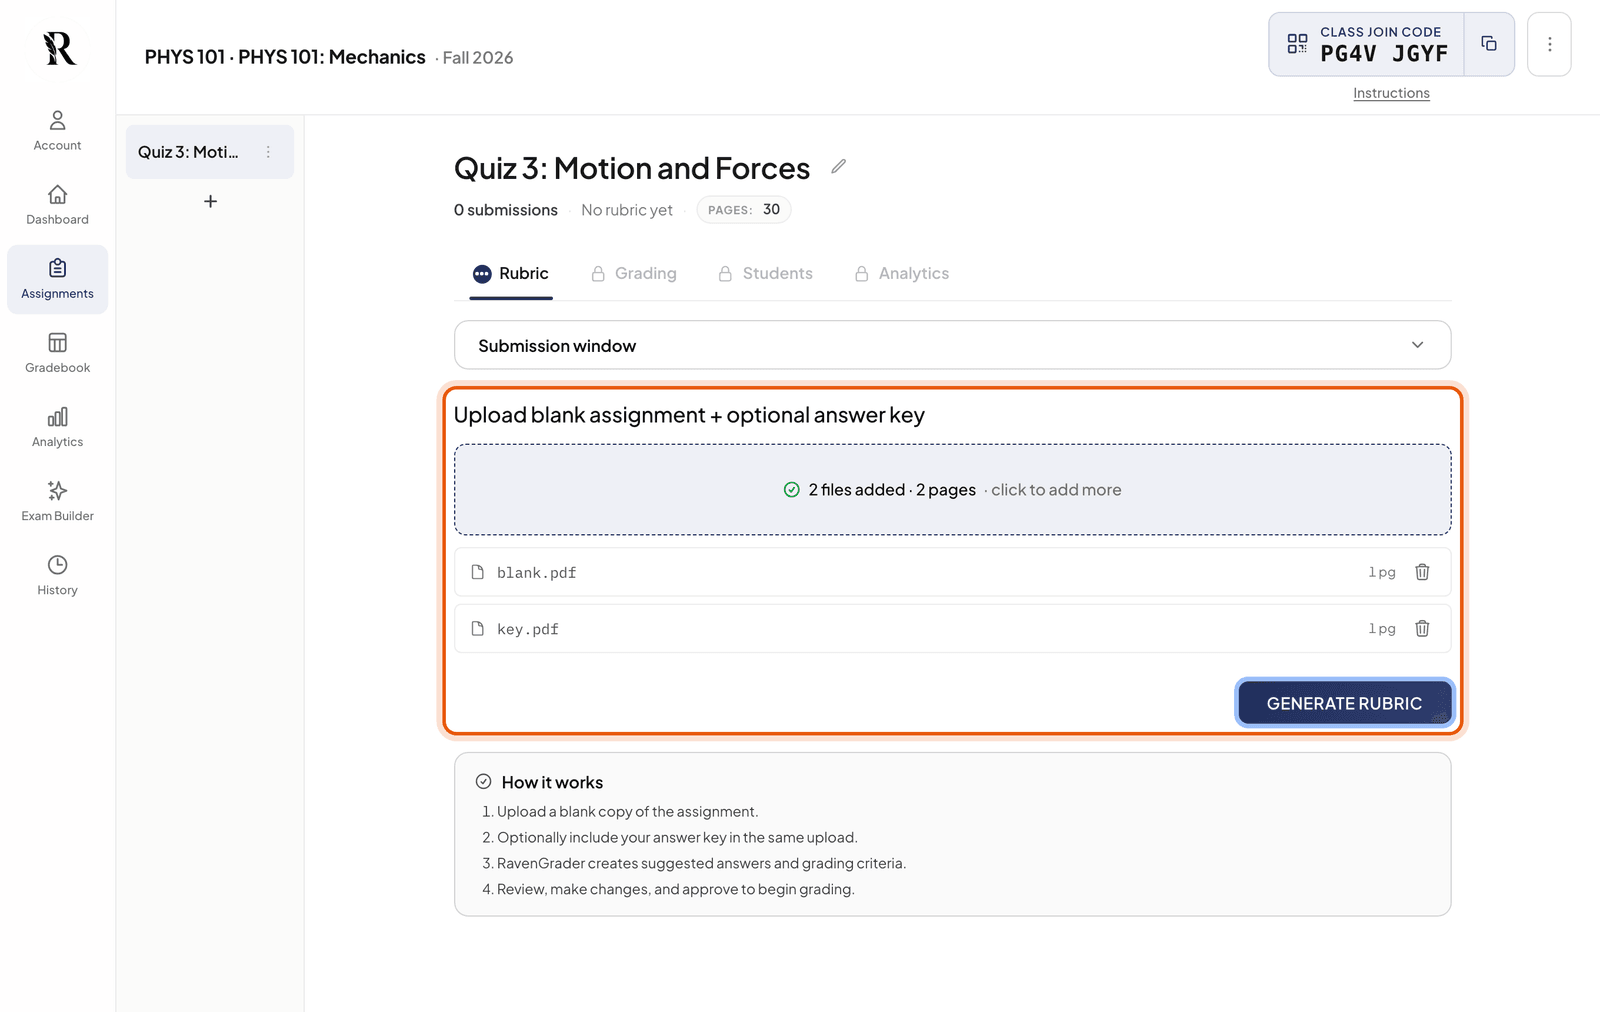
Where it is: the upload box on the Rubric tab, with Generate rubric under it. No answer key yet? Upload just the blank exam. RavenGrader works out the answers, and you check them in the next step. Worked solutions in your key give better partial credit than final answers alone.Step 5: Check the rubric, then approve it
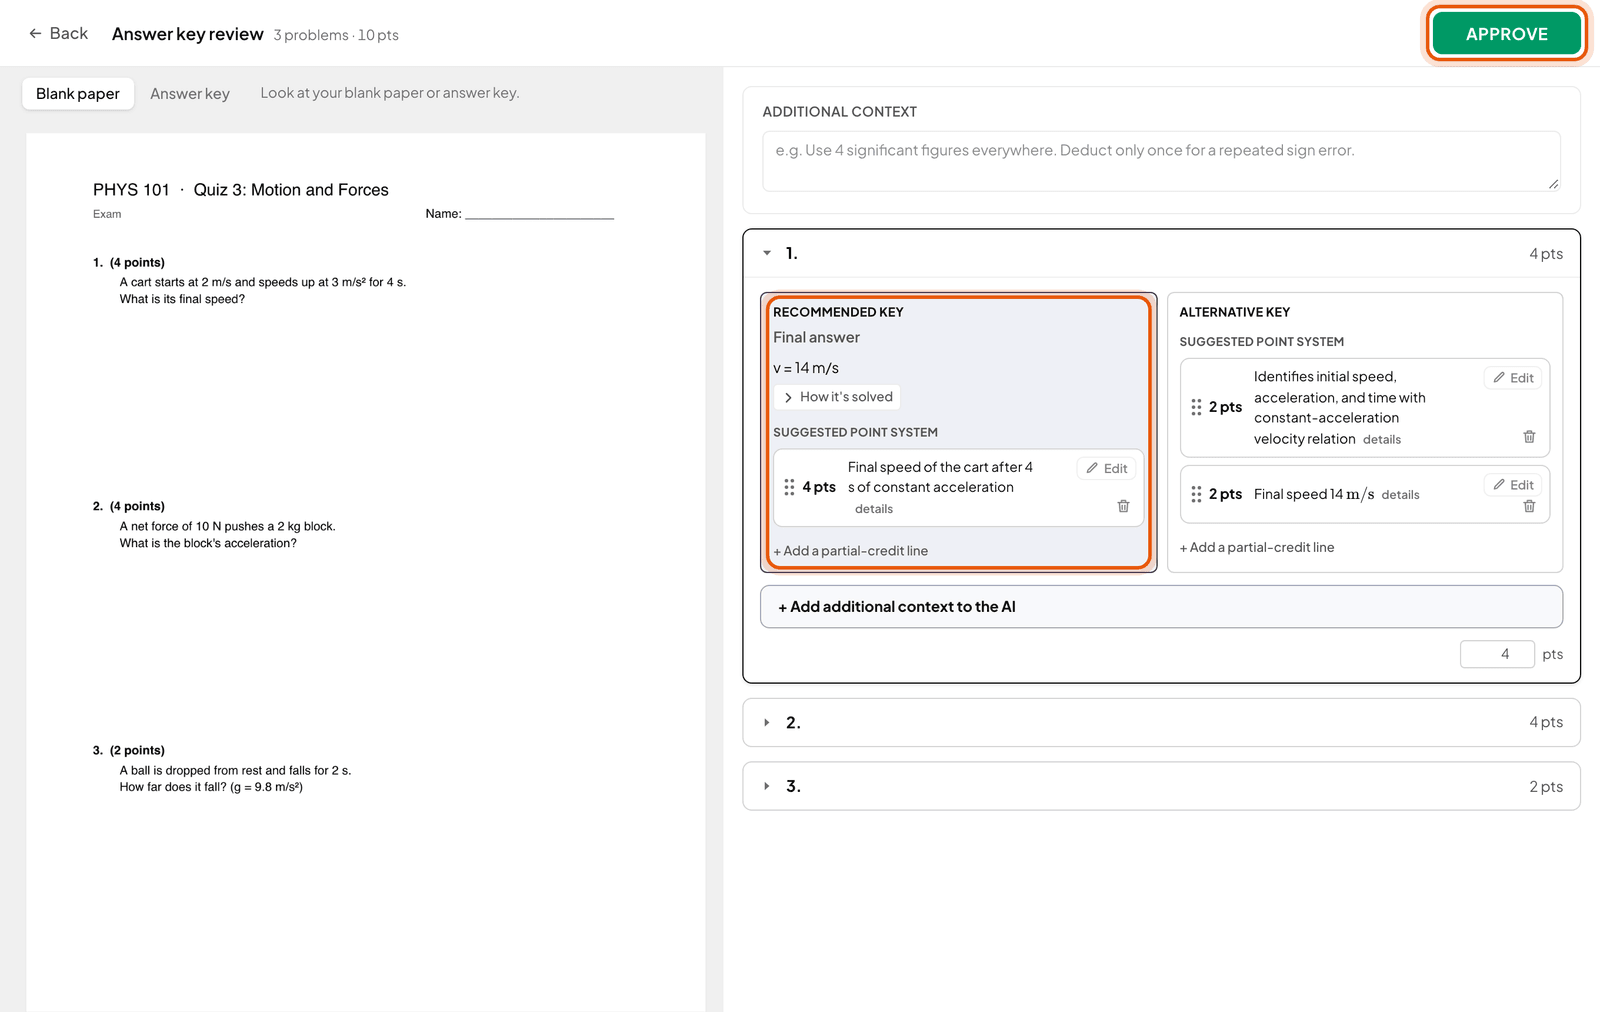
When the answers are ready, click Review & approve. Your exam is on the left. On the right, click a question to open it. The Recommended key shows the answer, how it’s solved, and how the points are split. Read it now. Every paper gets graded against it, so a mistake here shows up on the whole class.
Click Edit to change a line, + Add a partial-credit line to give credit for part of the work, or + Add additional context to the AI for anything else, like “units are required”. When it looks right, click Approve in the top right corner.
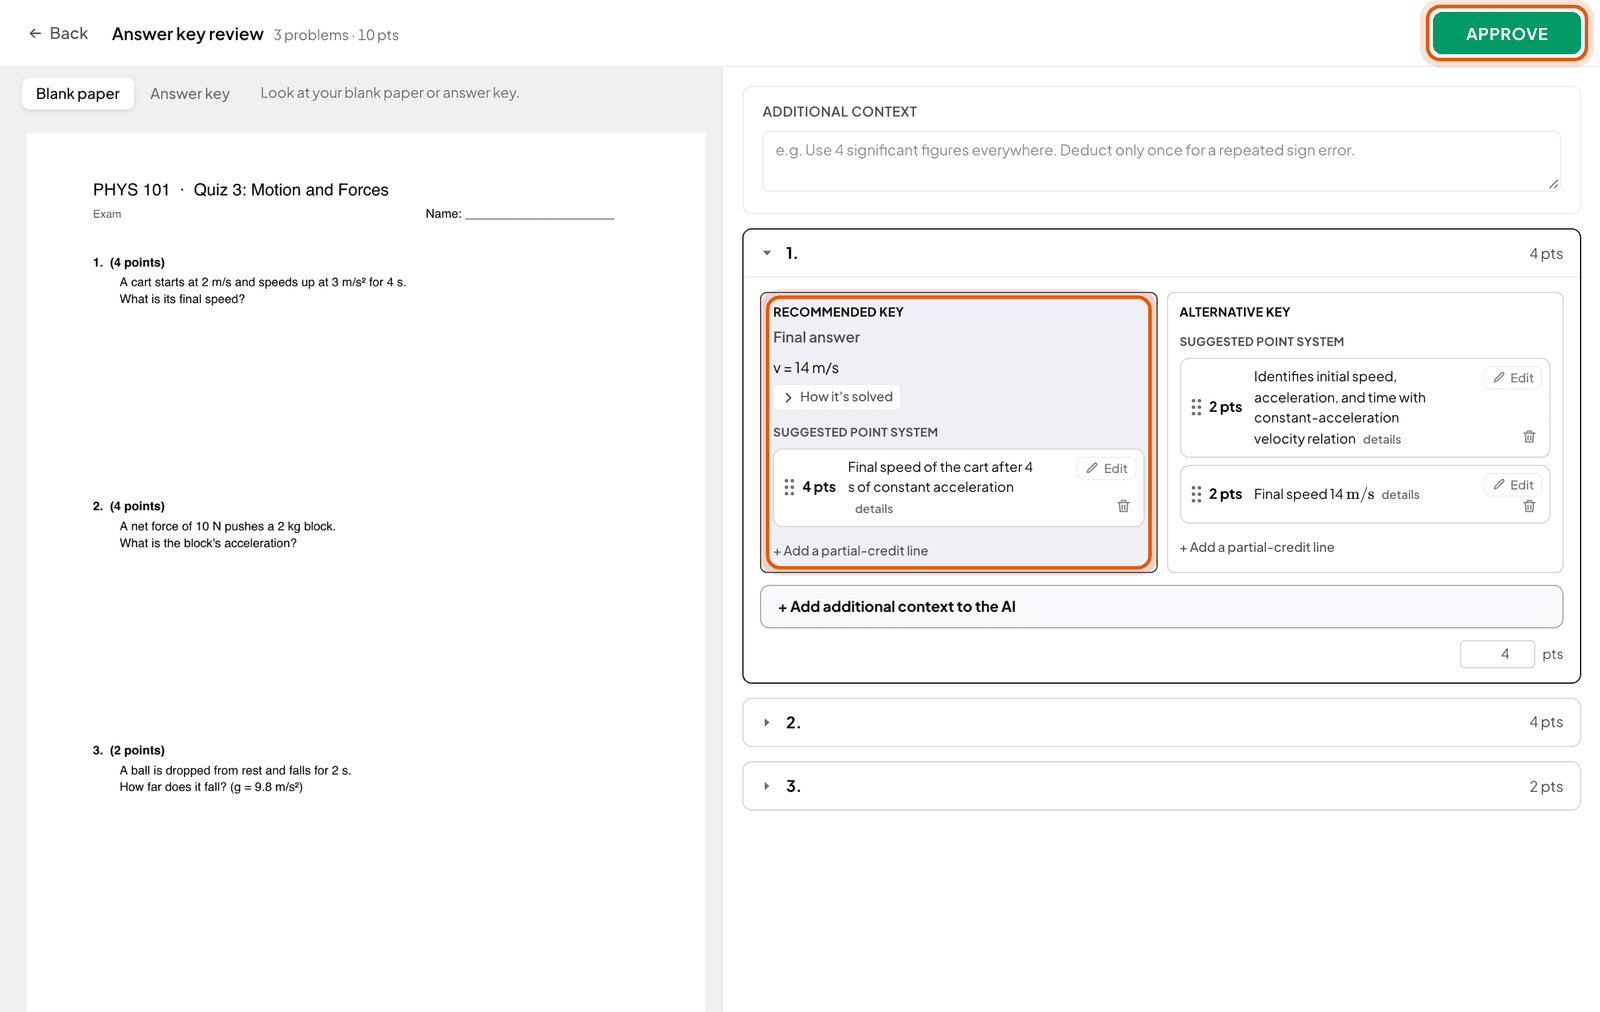
Where it is: the Recommended key for each question on the right, and Approve in the top right corner. Step 6: Upload the class's work
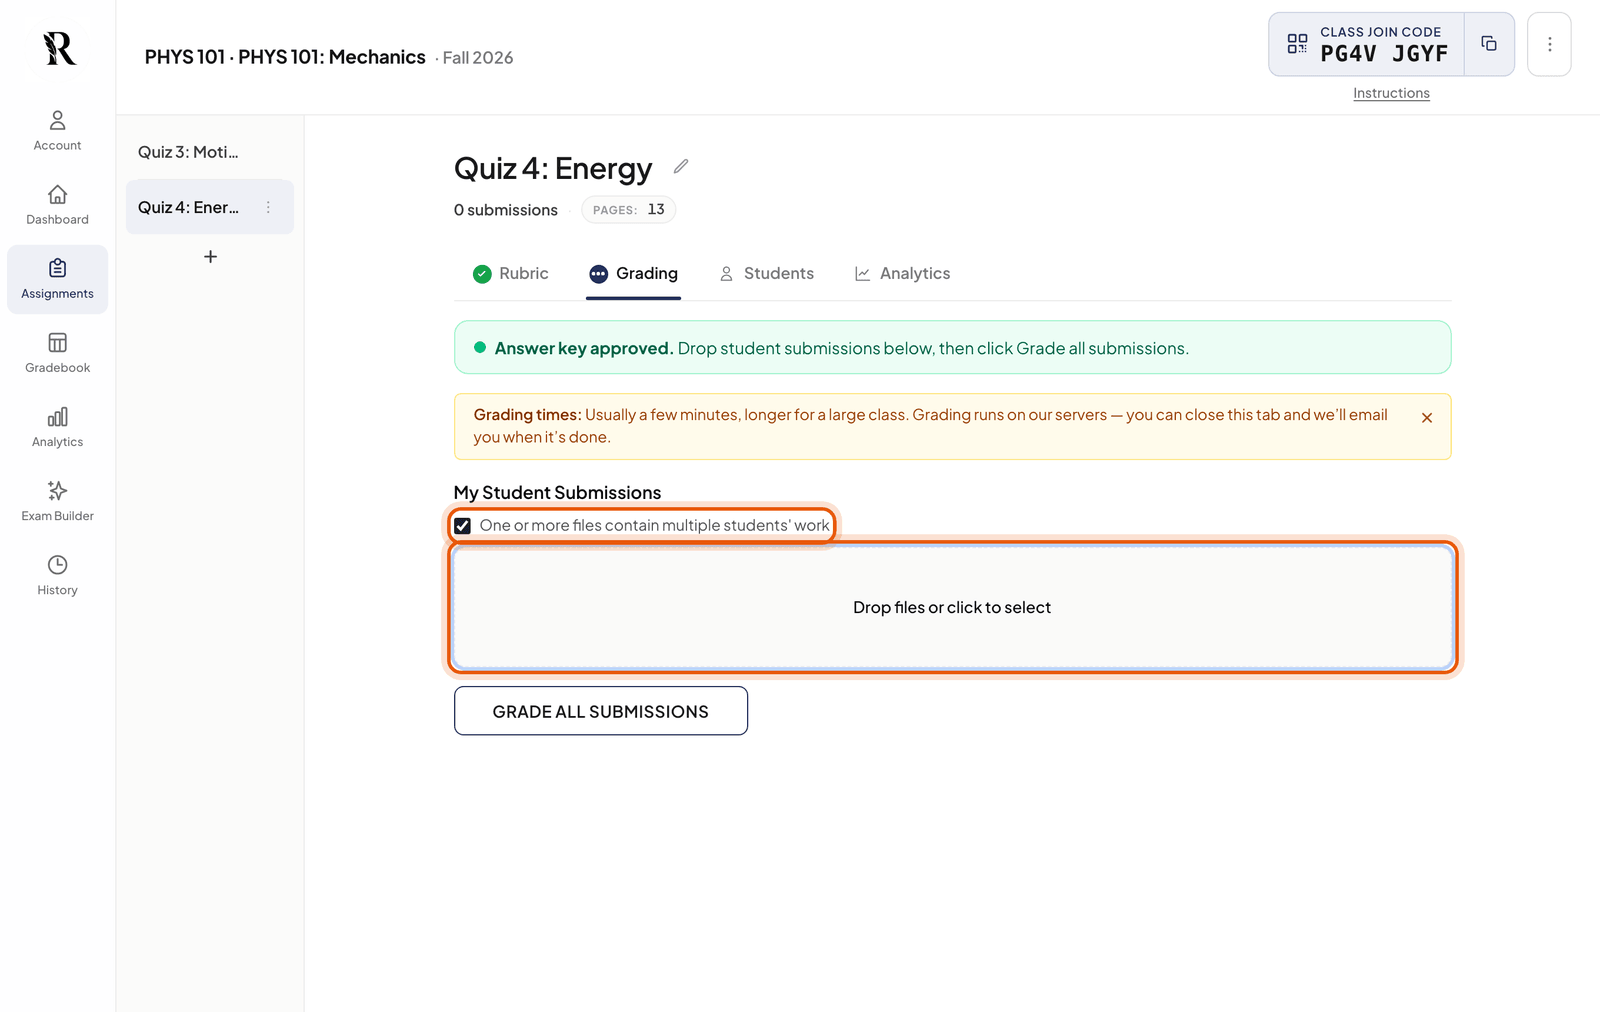
Go to the Grading tab and drop in the scans. If one PDF holds the whole stack, tick One or more files contain multiple students’ work. RavenGrader splits it into students for you.
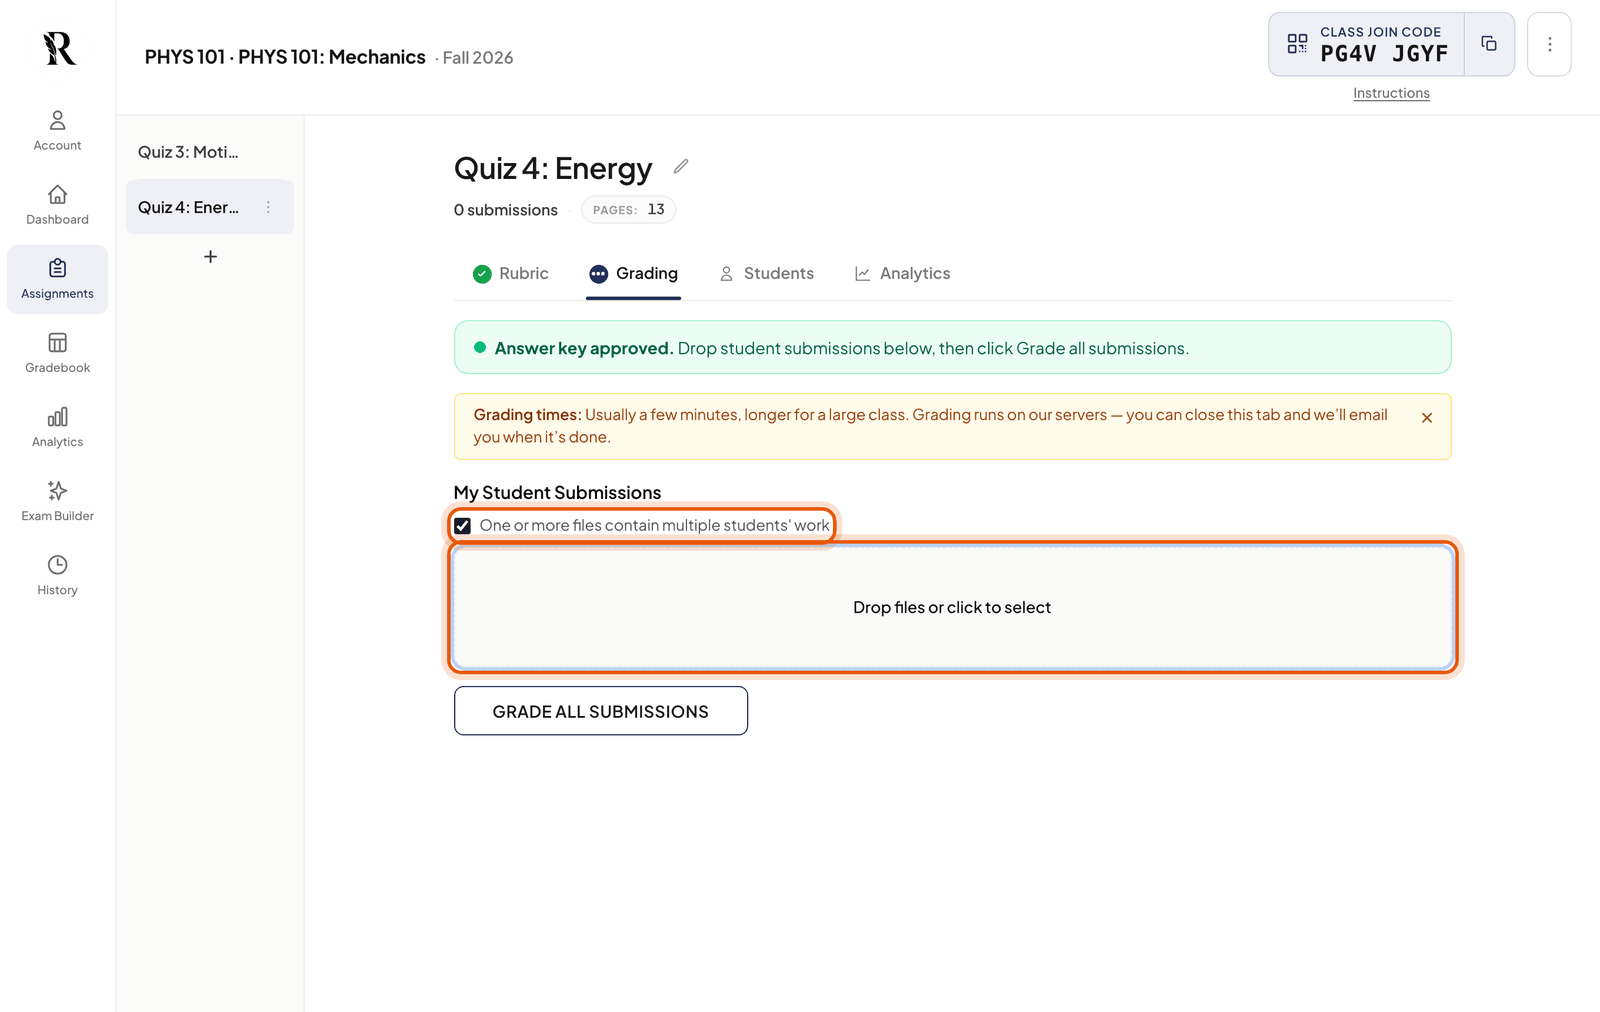
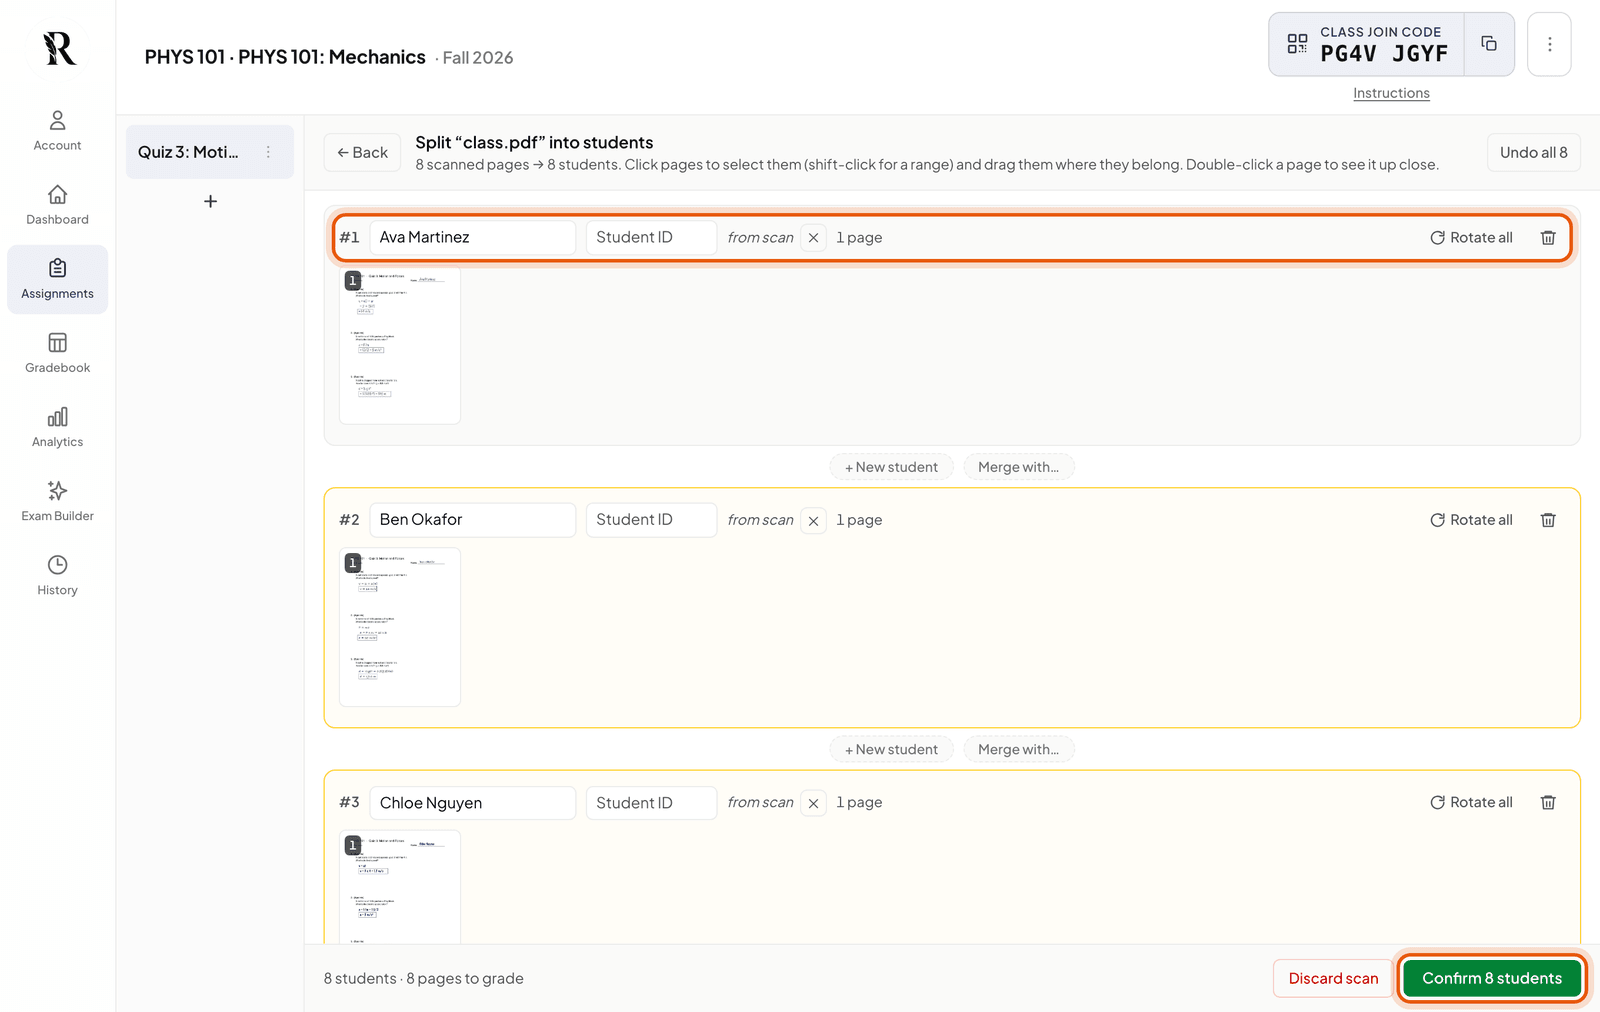
Where it is: the upload area on the Grading tab, and the checkbox under it. When it’s done, click Review & grade on the scan card. Each student gets a row with the name RavenGrader read and their pages. Fix a name if it’s wrong, or drag a page to the right student, then click Confirm 8 students (with your class size). Nothing is graded or charged until you confirm.
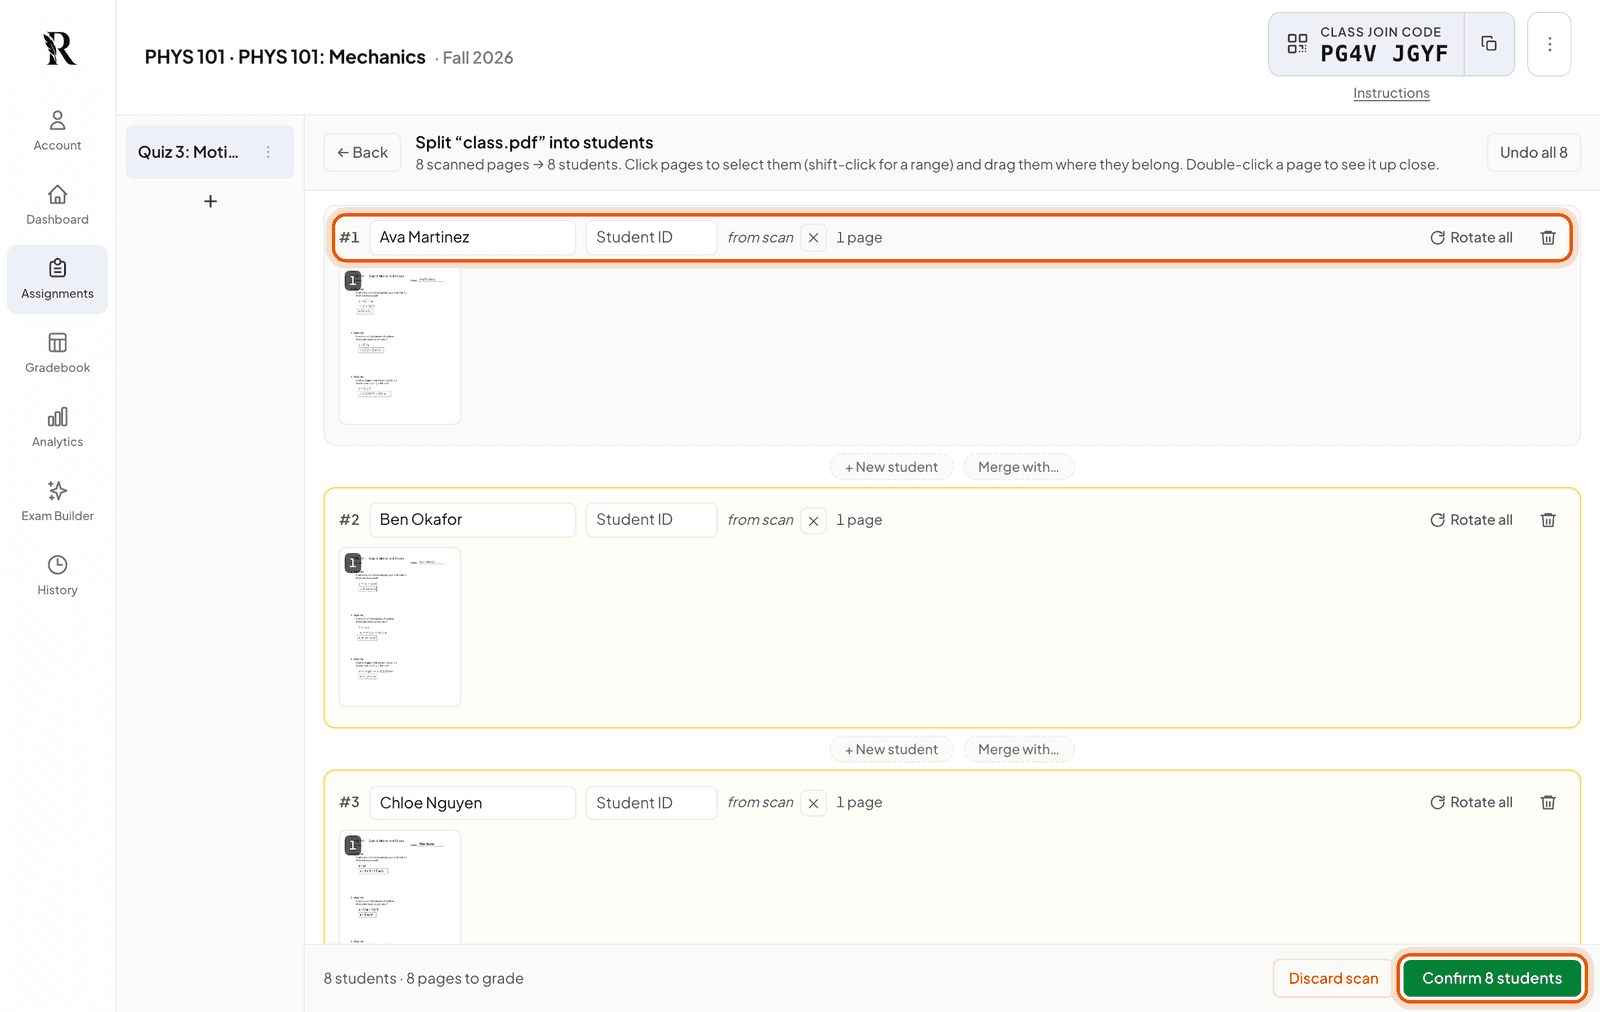
Where it is: one row per student, and Confirm in the bottom right corner. Students can also hand in their own work with your class join code. See Join codes.
Step 7: Show Raven how you grade
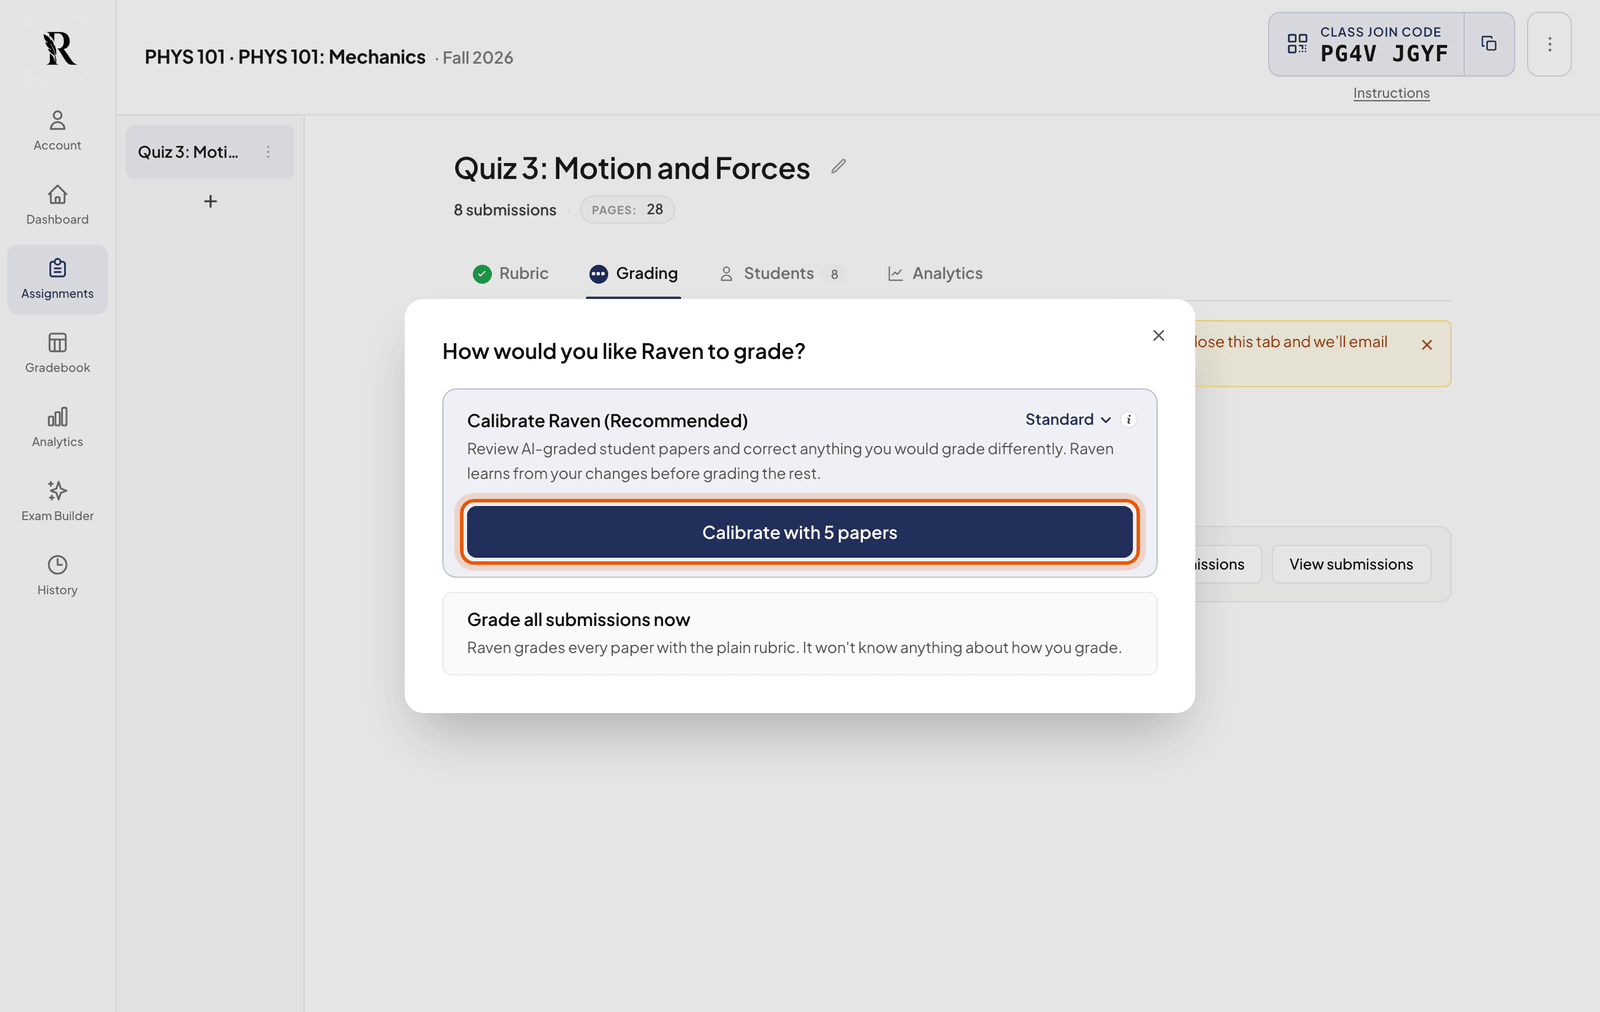
After you confirm the students (or click Grade all submissions), RavenGrader asks how you’d like it to grade. Click Calibrate with 5 papers. RavenGrader grades five sample papers first, and you correct them. That’s how it learns your standards before it grades everyone else. For a long or tricky exam, pick more samples from the Standard menu.
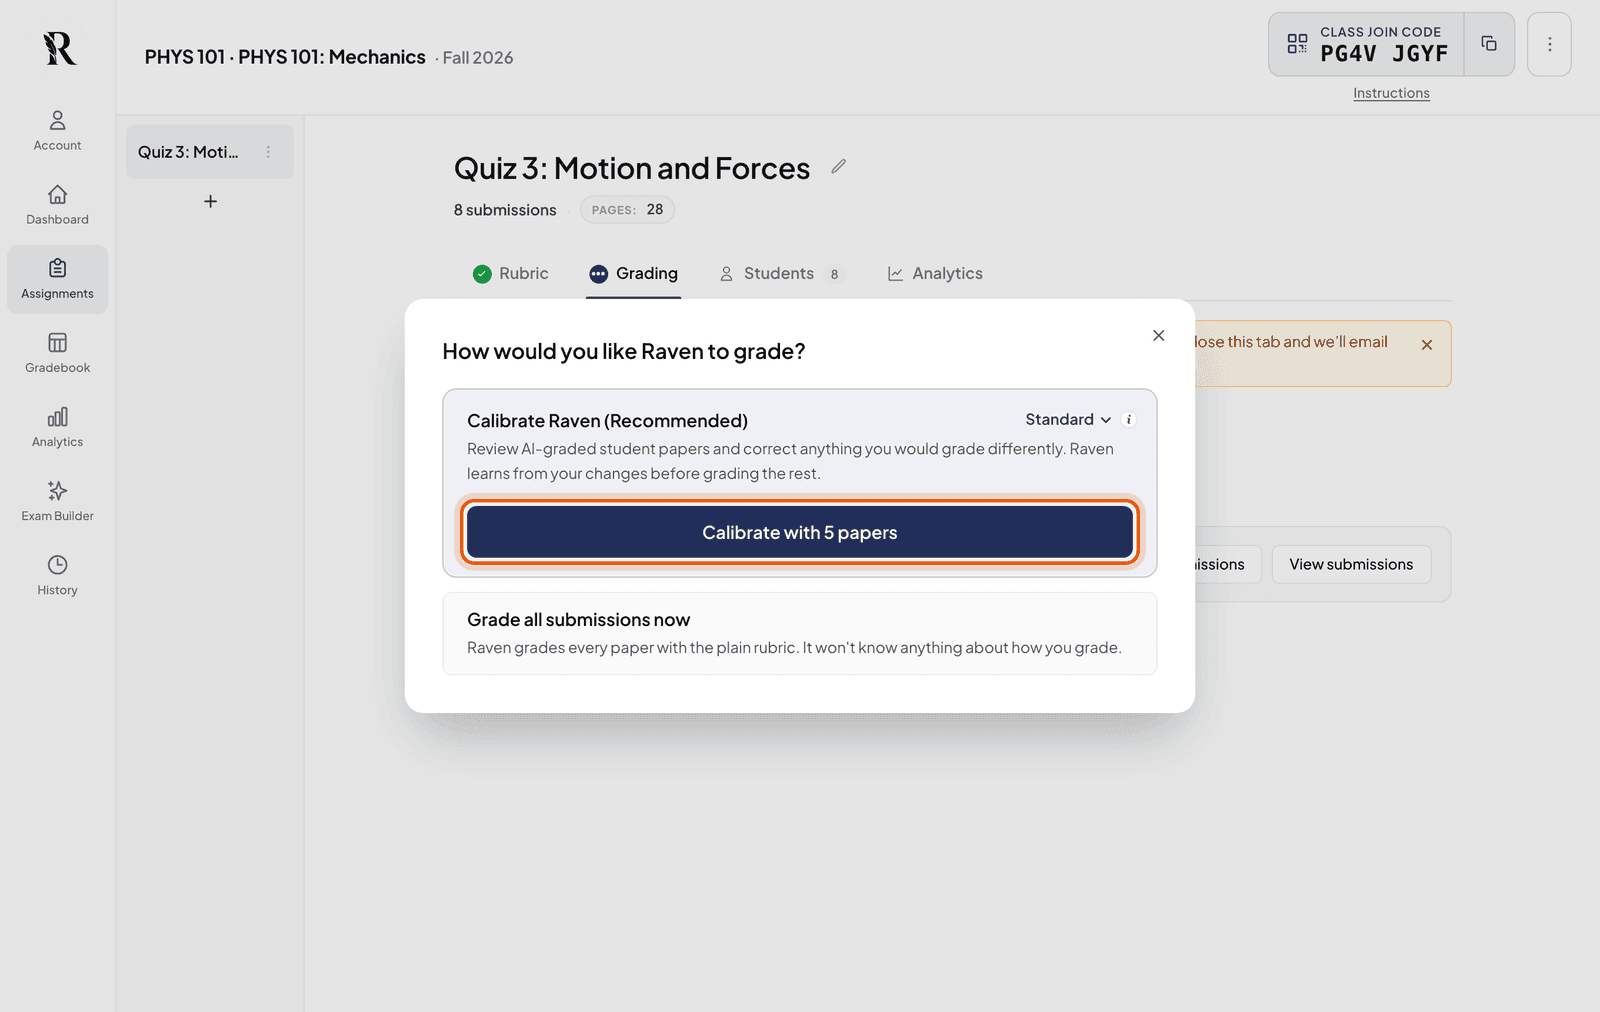
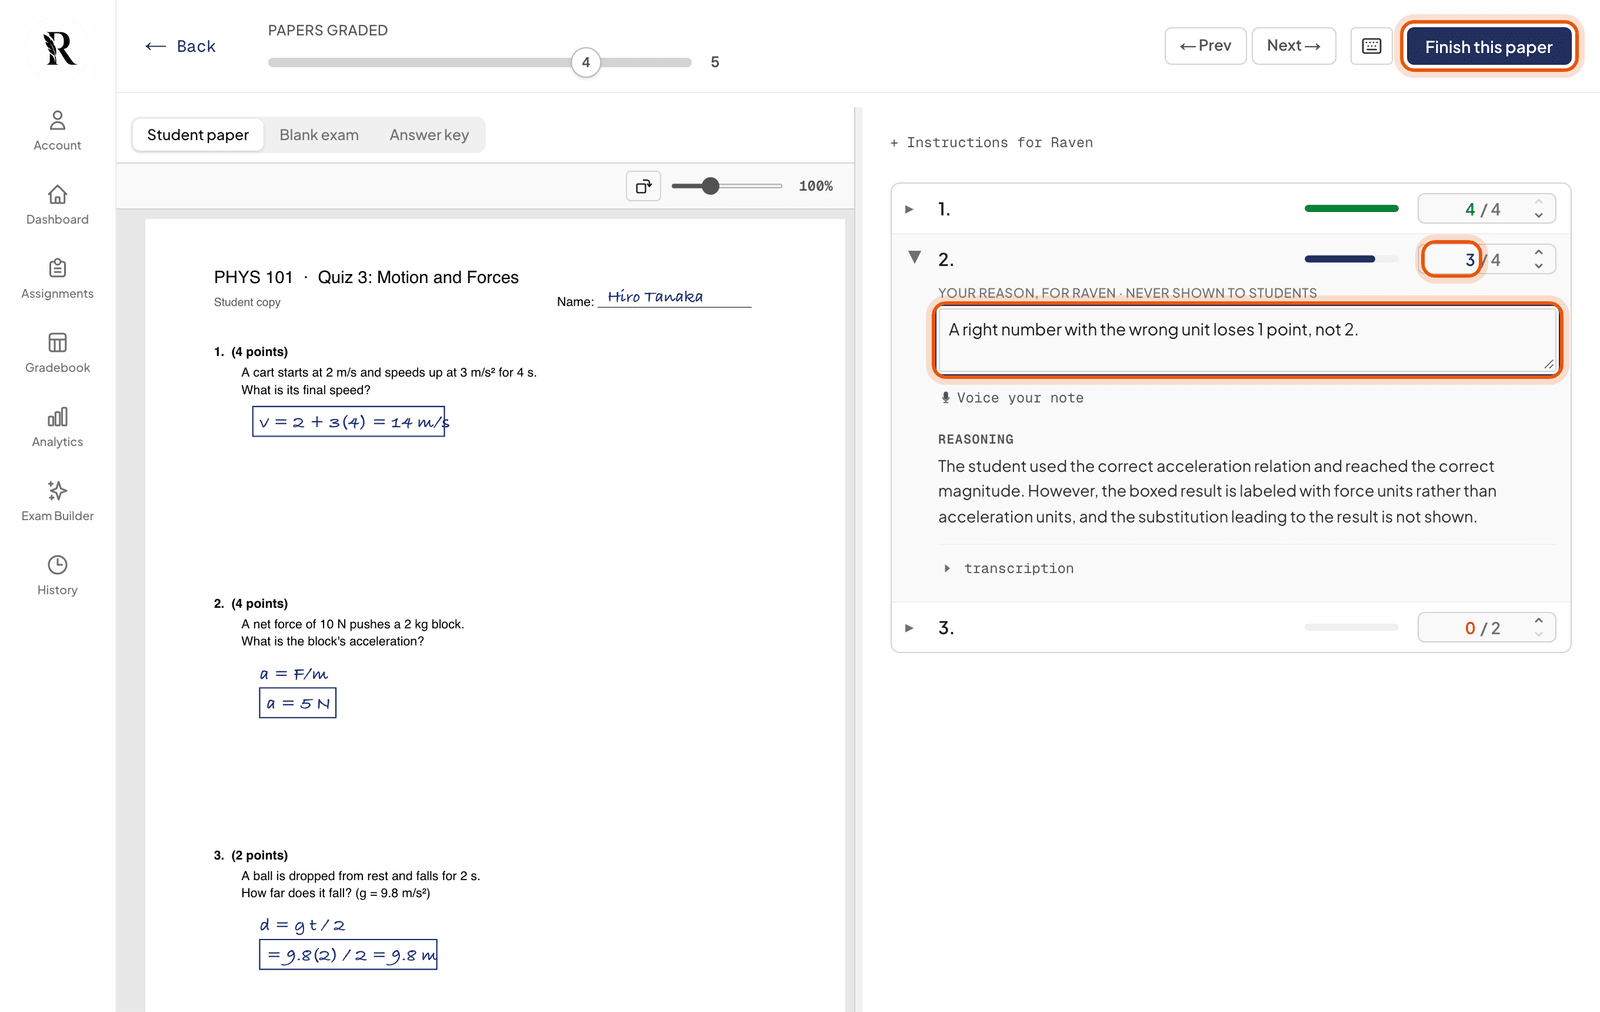
Where it is: the Calibrate with 5 papers button in the dialog that opens. The samples take a few minutes, and you can leave the page meanwhile. When they’re ready, click Review next paper. Each sample opens with the student’s page on the left and RavenGrader’s scores on the right. Click a question to see why it gave that score.
Change any score you disagree with. A box opens asking why: type one sentence, like “a right number with the wrong unit loses 1 point, not 2”. Students never see it. Then click Finish this paper and go on to the next one.
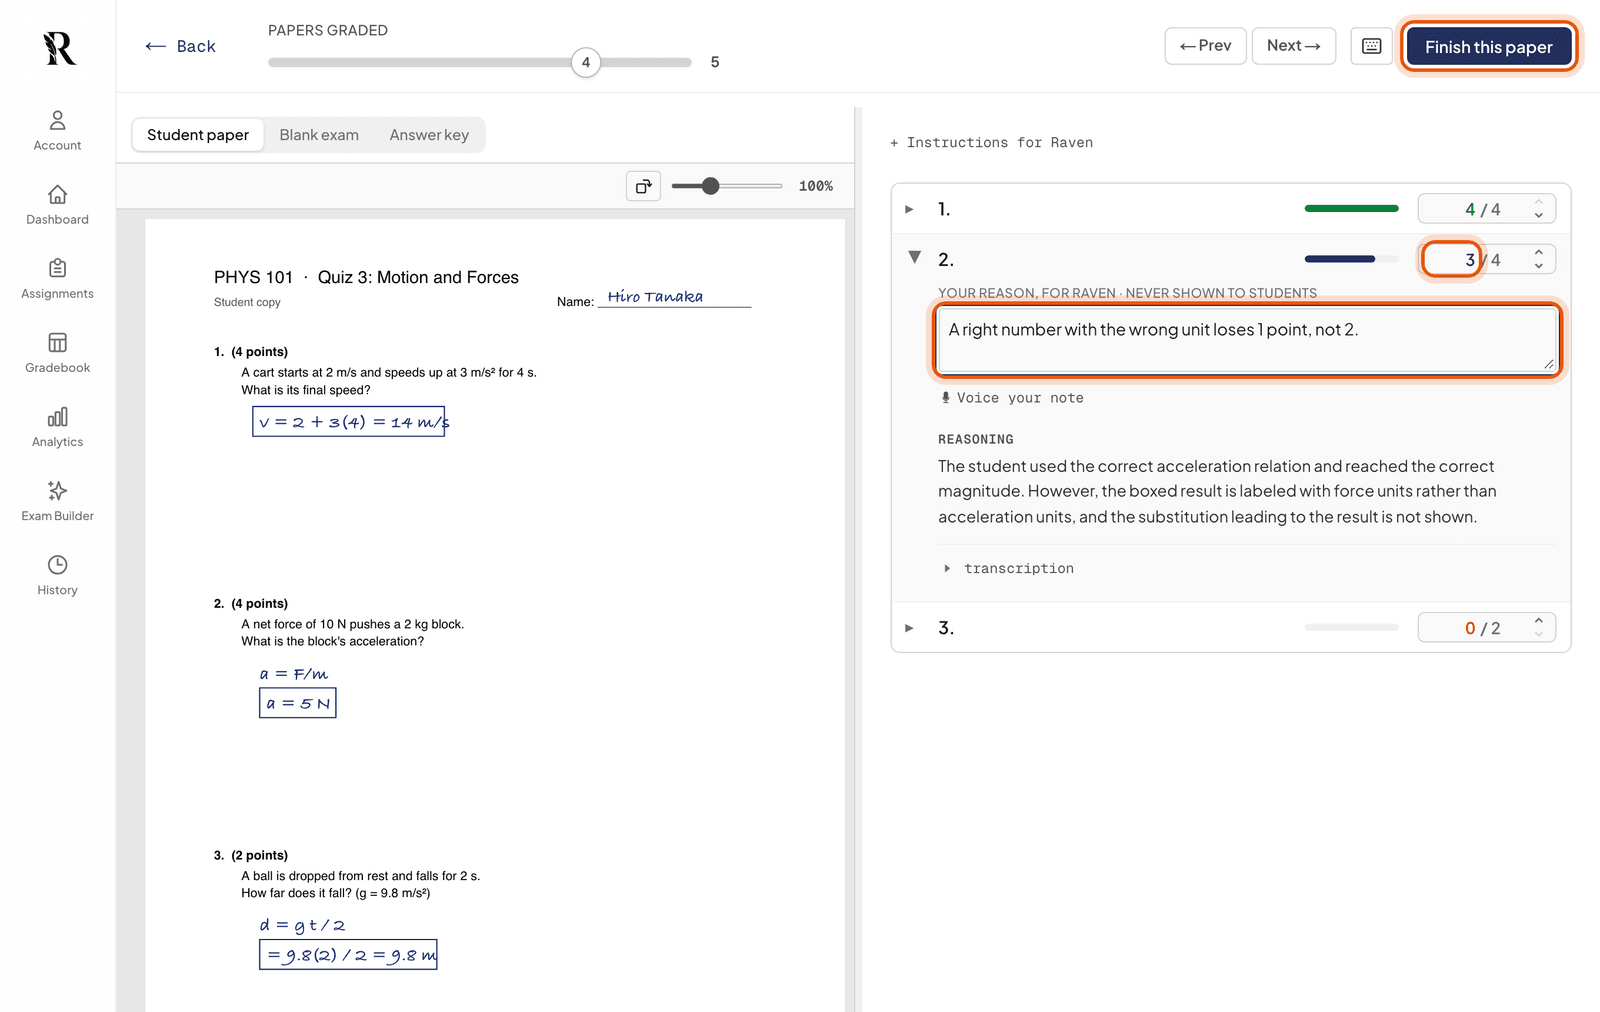
Where it is: the score you changed, the reason box under it, and Finish this paper in the top right corner. In a hurry? Grade all submissions now skips this step. You can still fix any grade afterwards, but calibrating first means fewer fixes.Step 8: Grade everyone else
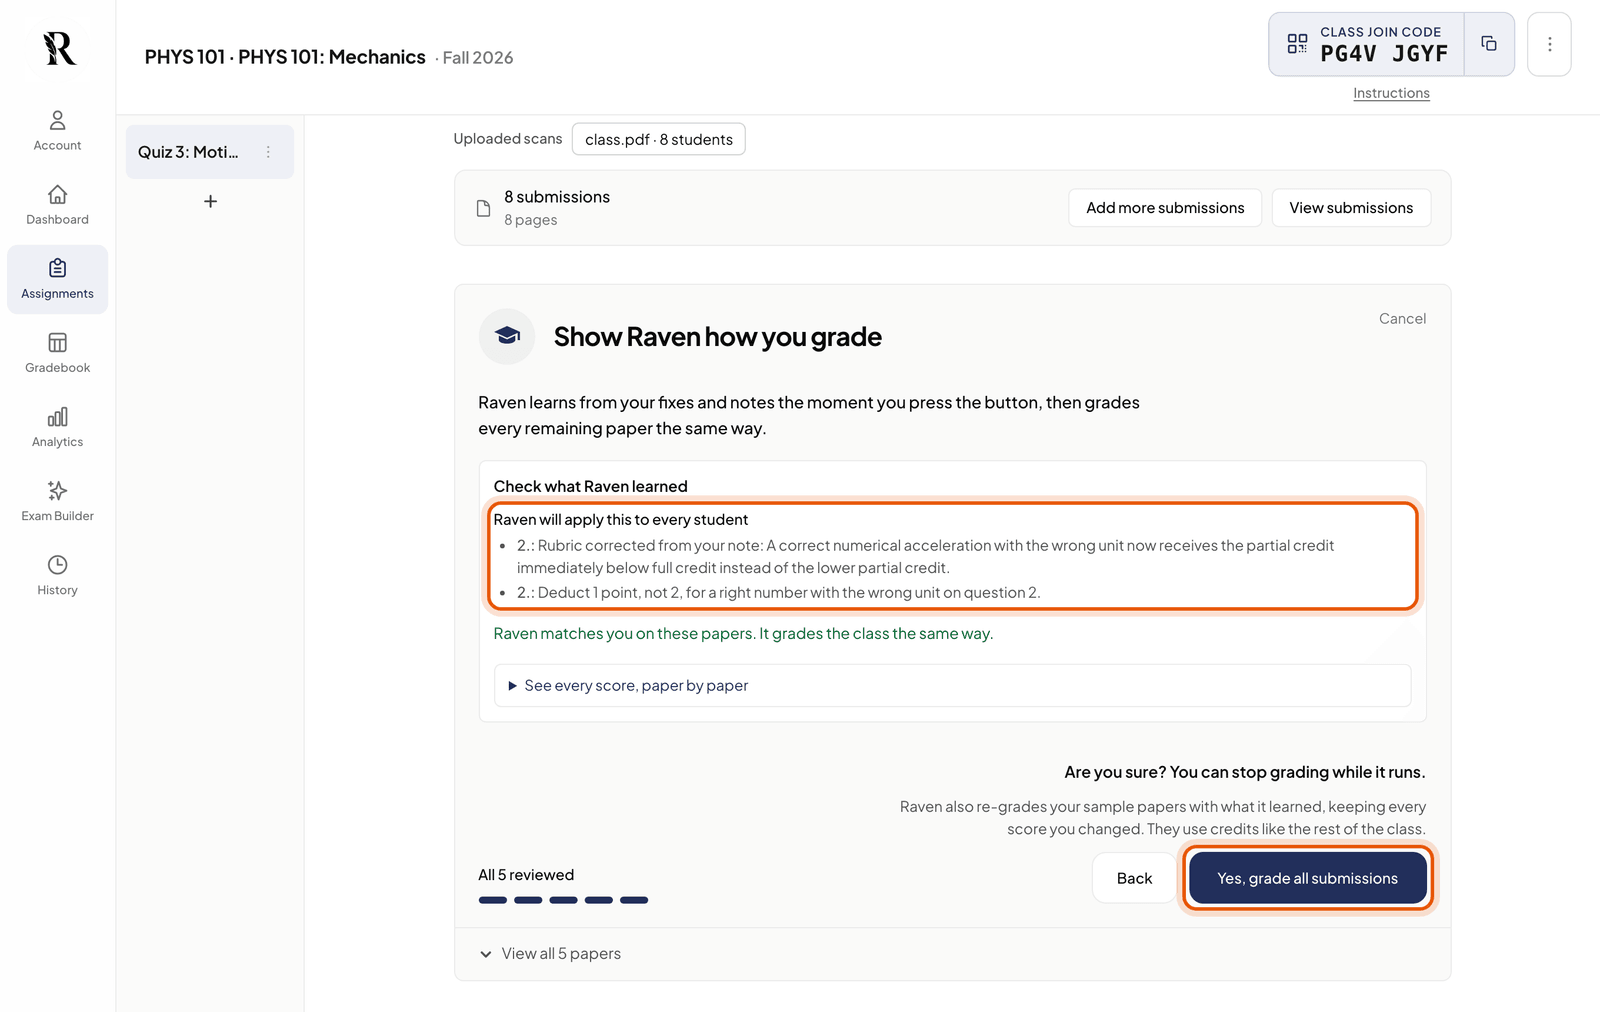
After the last sample, click Check what Raven learned. RavenGrader grades your samples again with what it learned, so you can see the difference before it grades the class. Then click Grade All Submissions and confirm with Yes, grade all submissions. Your samples get graded again too, with every score you changed kept as you set it, so they use pages like the rest of the class.
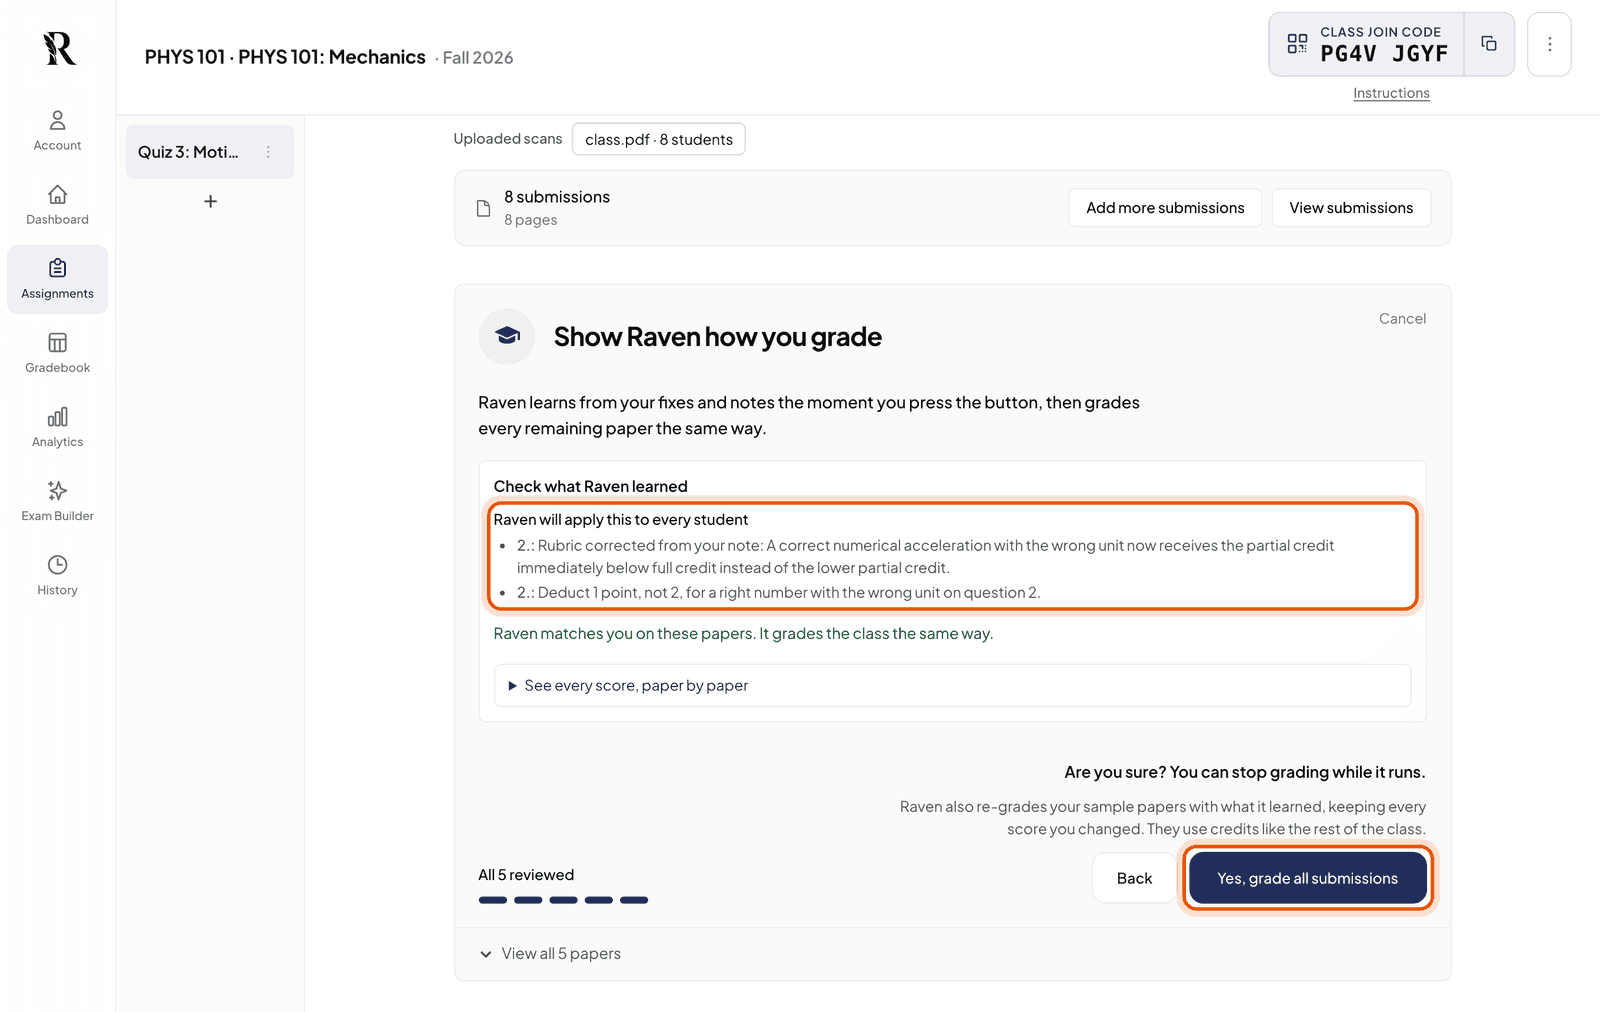
Where it is: what RavenGrader learned from your notes, and Yes, grade all submissions under it. Grades fill in as each paper finishes. You can close the tab. Grading keeps going on our servers, and we’ll email you when it’s done.
Changed your mind mid-run? Stop grading stops it. Papers already graded keep their grades, and the pages for the rest go back to your balance.
Step 9: Look over the grades
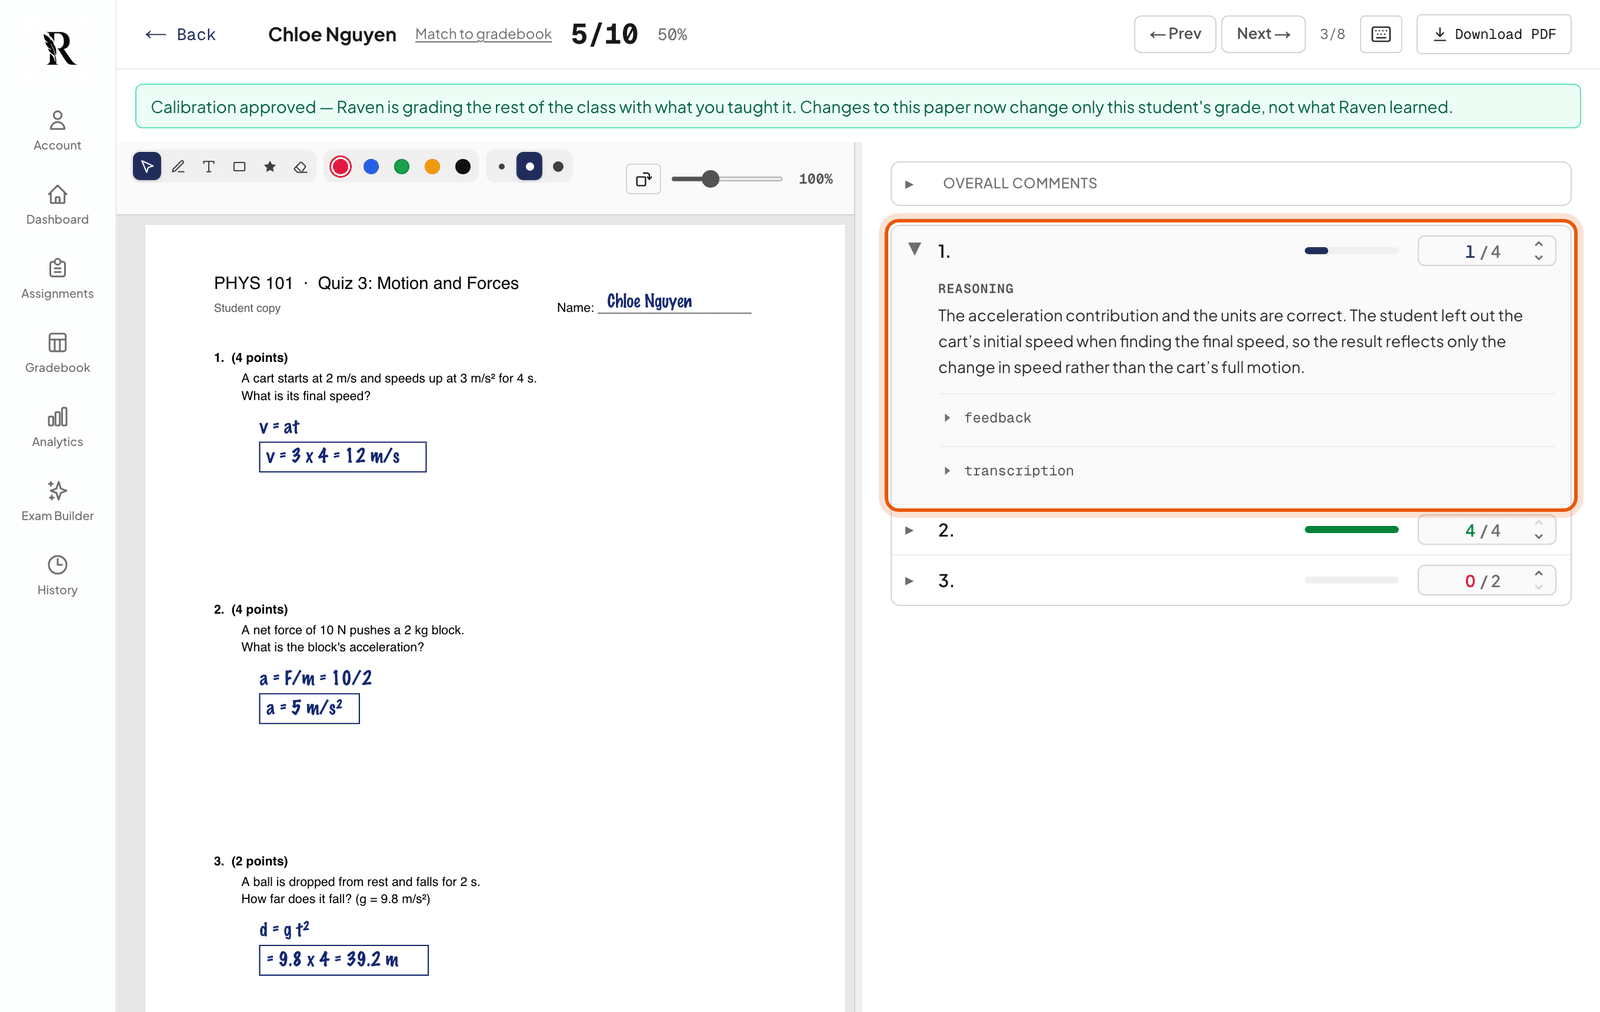
Grades are final when they land. On the Students tab, click any name to open that paper: the student’s page on the left, the scores on the right. Click a question to read why it got that score and the feedback the student will see. Change a score or the feedback and it saves on its own.
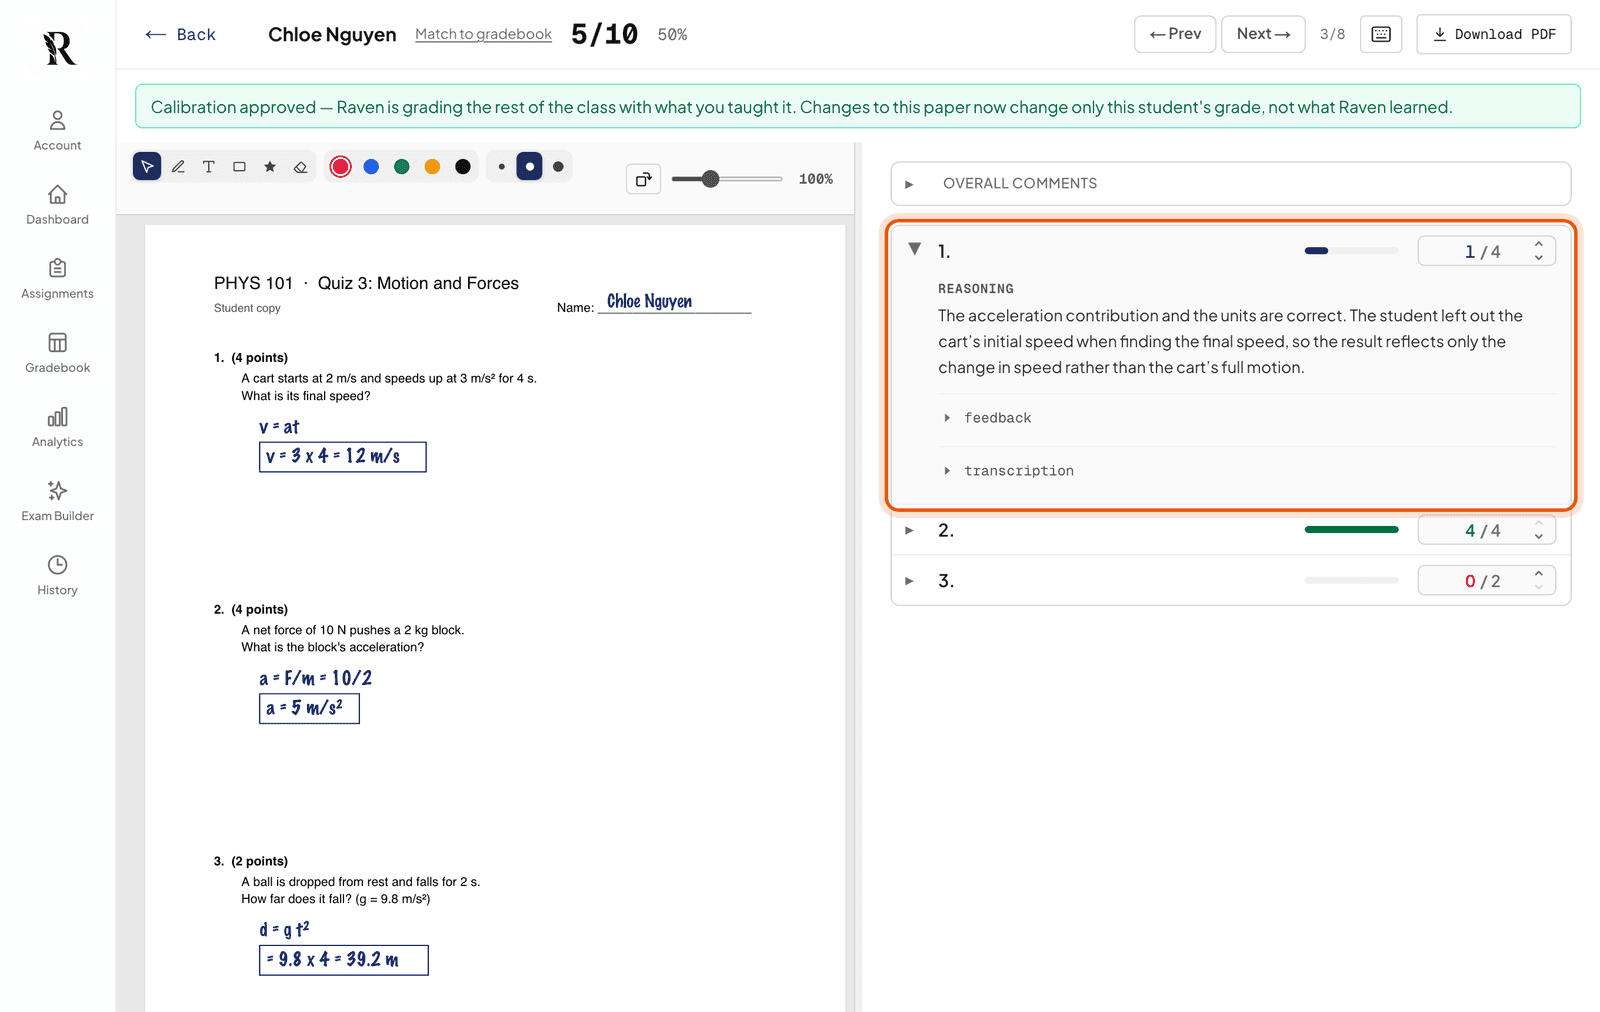
Where it is: the question you opened on the right, with its score box in the top right corner of the card. Step 10: Send students their results
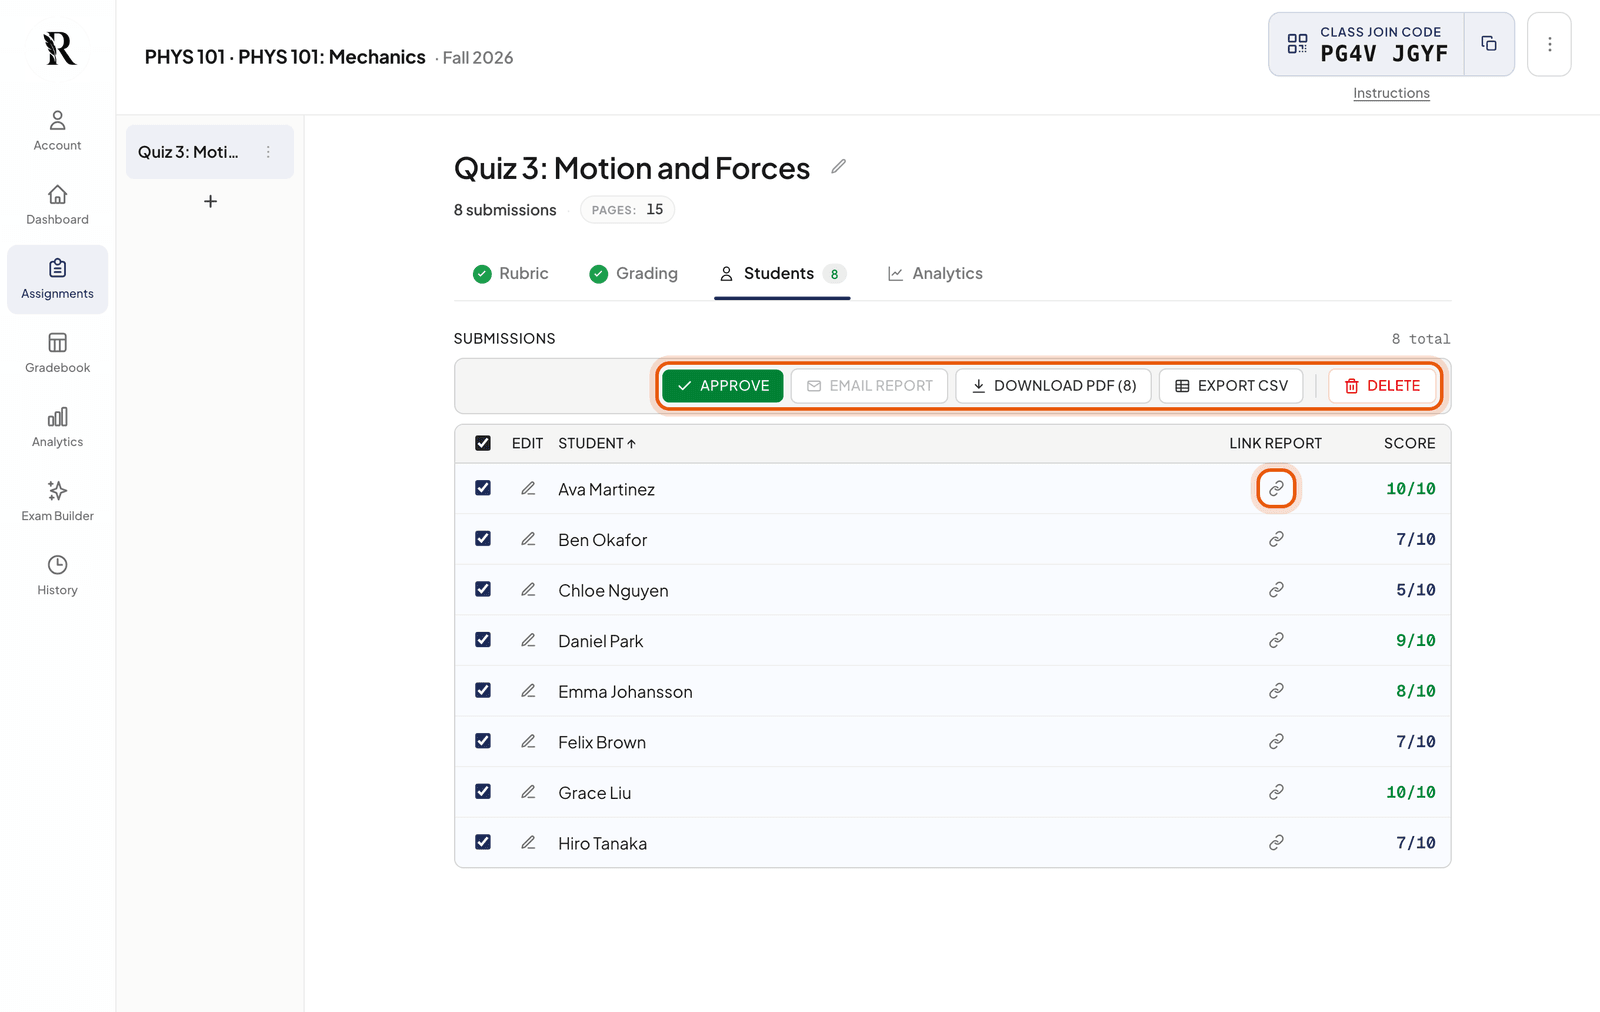
On the Students tab, tick the students you want. The buttons along the top then let you:
- Email report: send each student a private link to their feedback. It works for students RavenGrader has an email for, which means anyone who handed in with the join code, or who is on your class list in the Gradebook.
- Download PDF: the pages each student handed in.
- Export CSV: the scores, for your gradebook.
For anyone else, click the link icon in their row to copy their report link, and send it yourself.
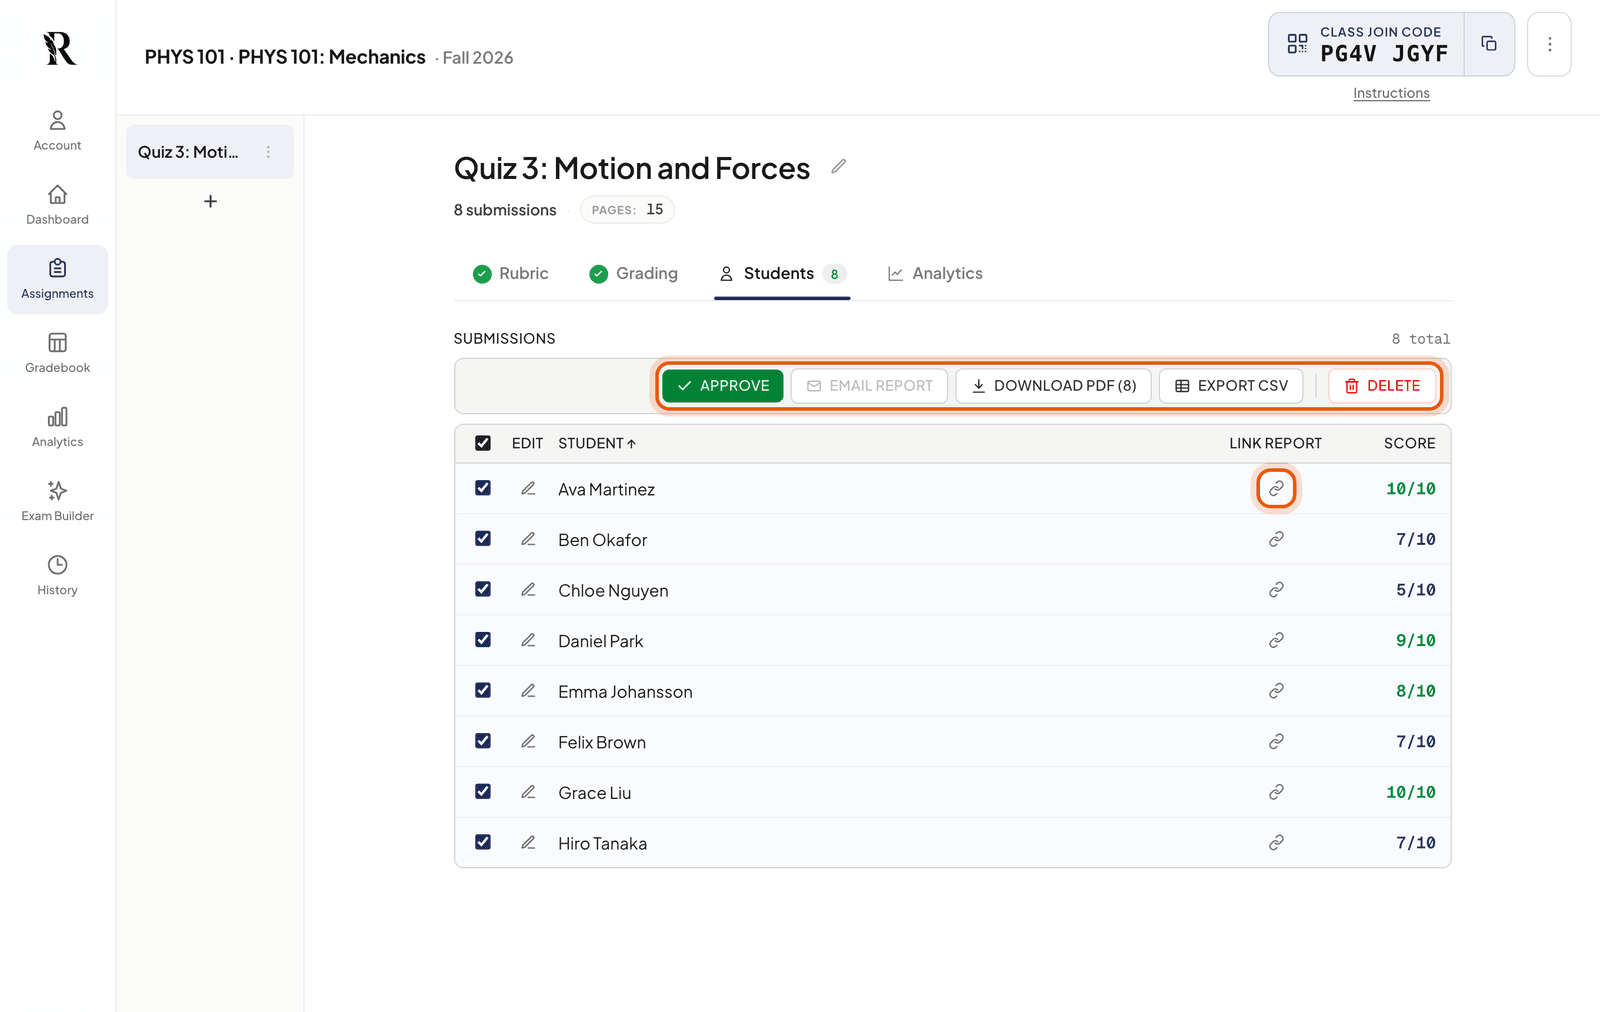
Where it is: the buttons along the top of the Students tab, and the link icon in each row. You’ll also see Approve here. Approving is optional: it marks the papers you’ve checked. Report links, emails and exports work either way.A report shows each question’s score and feedback. It always shows the latest grade, so if you fix a score later, the student sees the fix without you sending anything again.
Step 11: See how the class did
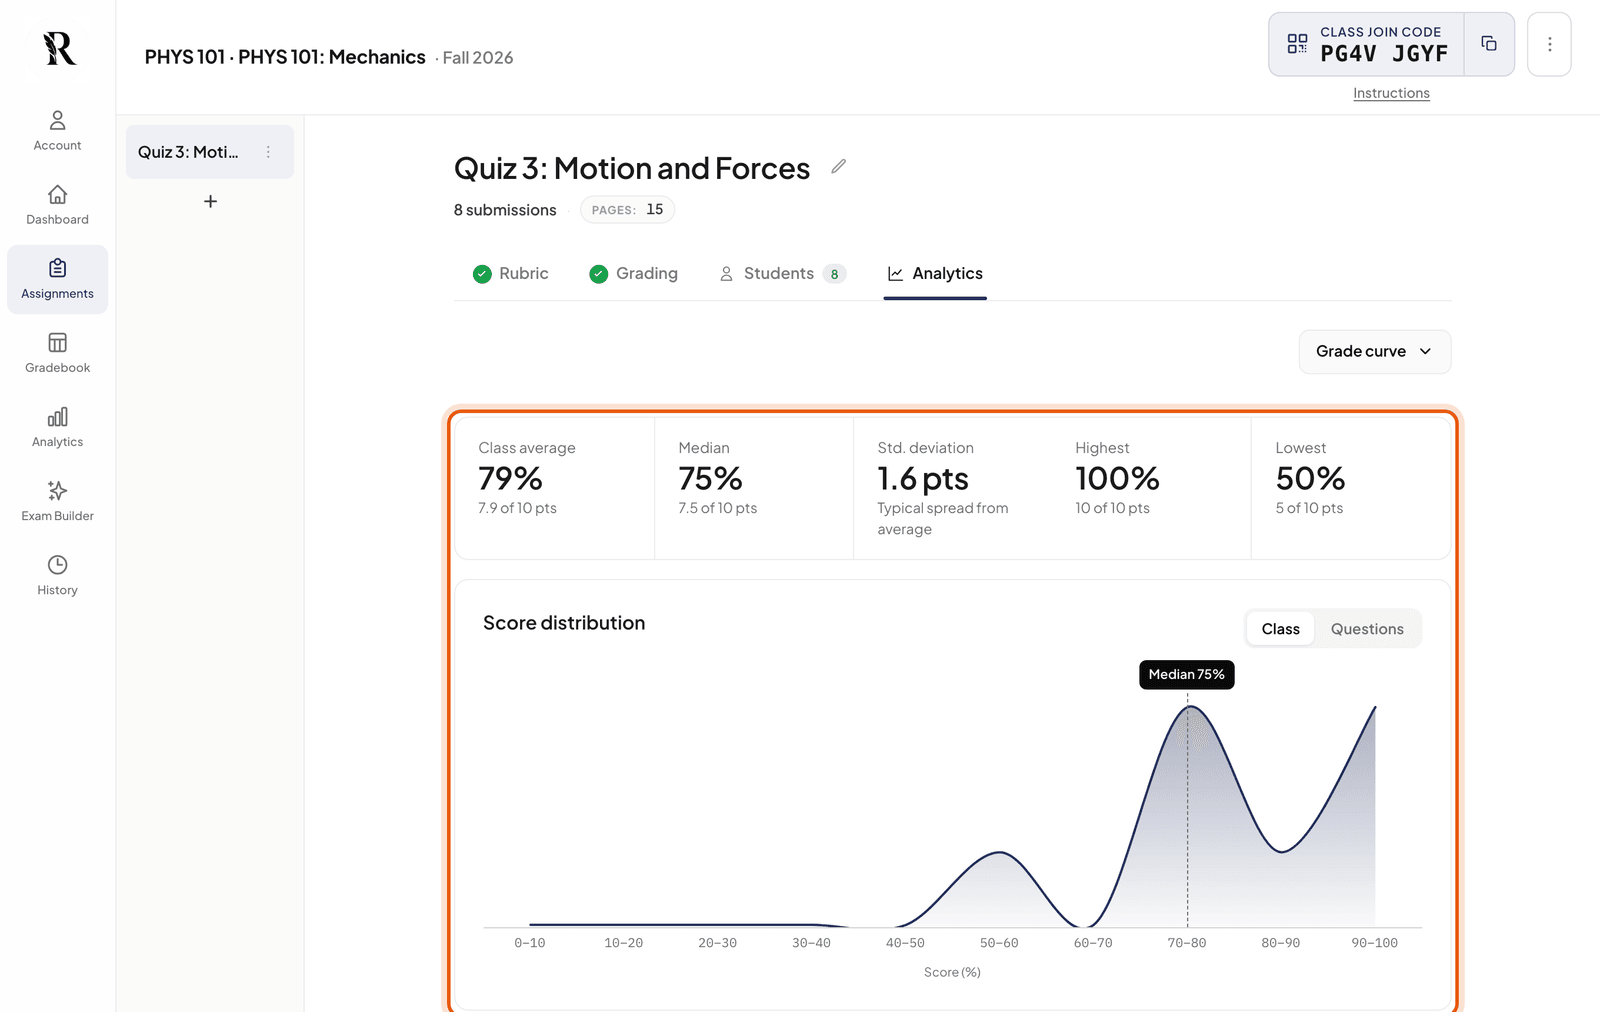
The Analytics tab shows the class average, how scores spread out, and how each question went. It’s the quickest way to spot the question half the class got wrong.
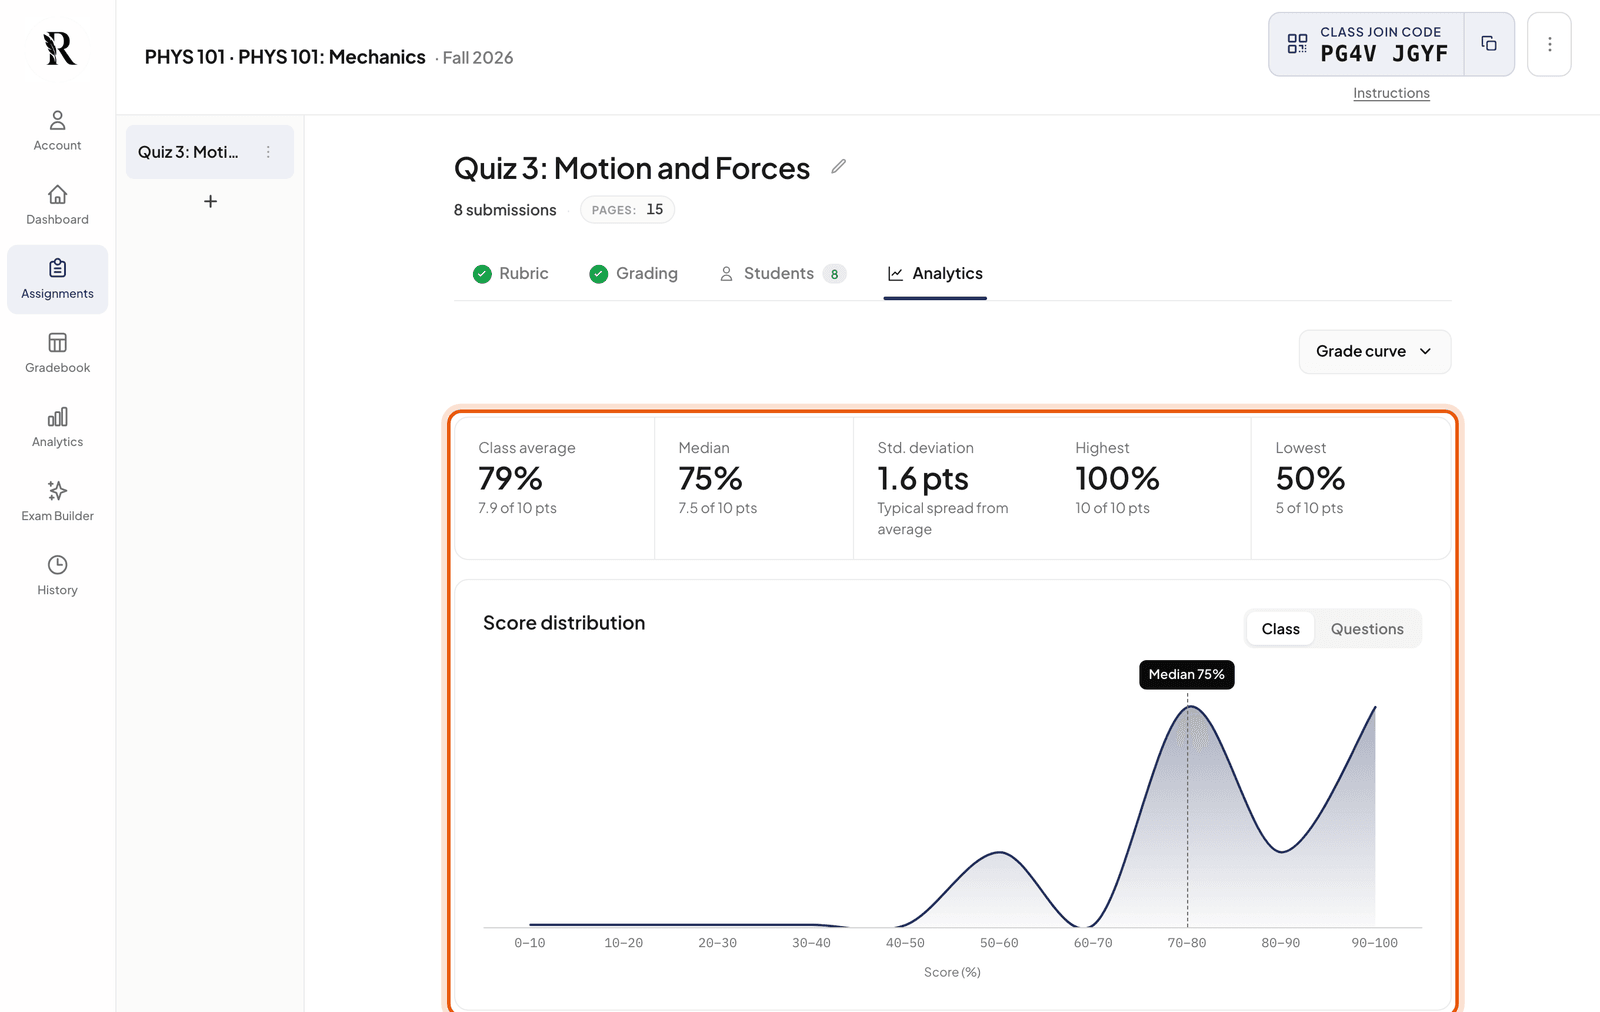
Where it is: the class numbers and score chart on the Analytics tab, the last tab along the top. Switch the chart to Questions to see each question.